Chicken Coop Insulation | How I Am Insulating And What I’m Using
As you continue to follow along, I had decided that I needed chicken coop insulation. Why? Because it gets wicked cold up here during the winter.
It is not uncommon for temperatures to drop below zero (F) during many nights (and days!). And it’s also nearly certain that we’ll see occasional temperatures as low as 20 or 30 below zero during some nights and days throughout the winter months.
Although my birds are cold tolerant, I decided to make their lives a little more comfy for the winter months. Here’s how I chose to insulate the coop.
I insulated the floor, ceiling, the walls, and the door.
I essentially made a insulation sandwich for each section.
Sheathing – Foam Board Insulation – Sheathing
What type of insulation for chicken coop?
Foam board. So it won’t get wet, soggy (like fiberglass insulation) because it will be in an outside environment.
I used a type with foil on one side – which faces OUT. This helps reflect the outside temperatures.
UPDATE ON THE FOIL DIRECTION: As it turns out, apparently the slight benefit of the foil is negated if it’s “sandwiched” right up to the sheathing (no air-tight air gap). So in this case, the direction is a moot point. Oh well. We still get most of the R-value benefit of the insulation itself.
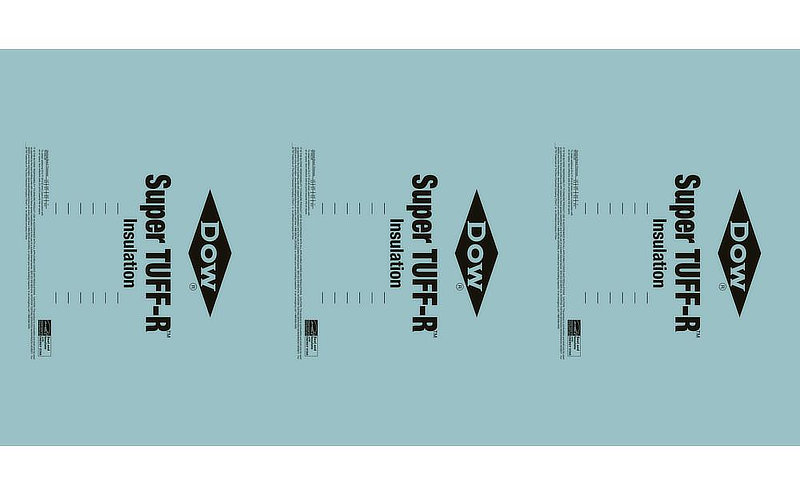
I happened to choose DOW Super TUFF-R (1″) available at HD.
R-value 6.5
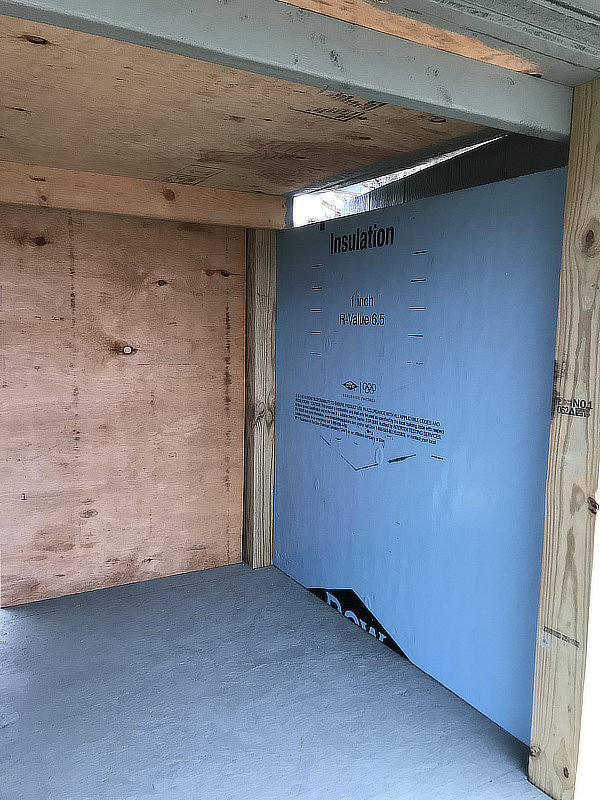
Here’s a photo of one wall. Actually the other walls are already done in this picture. The right side wall as shown reveals the 1-inch foam board with a R-value of 6.5. Combine that with two layers of 1/2-inch sheathing plywood (.6 x 2) and we’re looking at a total of almost R-8. Hey, it’s better than nothing!
The gap at the top is one of two vents (left & right side walls). I will be working on those later (adding adjustable closure for each – for weather conditions).
To hold the insulation sandwich together I used 2-inch screws – right through the sammich.
Easy to cut and install
The foam board is easy to cut. I simply marked the cuts for each piece with a sharpie and straight edge, then cut with a knife. I started with a long blade razor knife, but I found it easier with a heavier stiff sharp knife. The foam board was set on (and clamped to) saw-horses for convenience during marking and cutting.
I will be adding a chicken coop heater too. I already bought it and will do a separate post on that when it’s time.
Anyway, I just wanted to show my methodology for insulating my chicken coop for the winter (will help keep it cooler during the hot summer too).
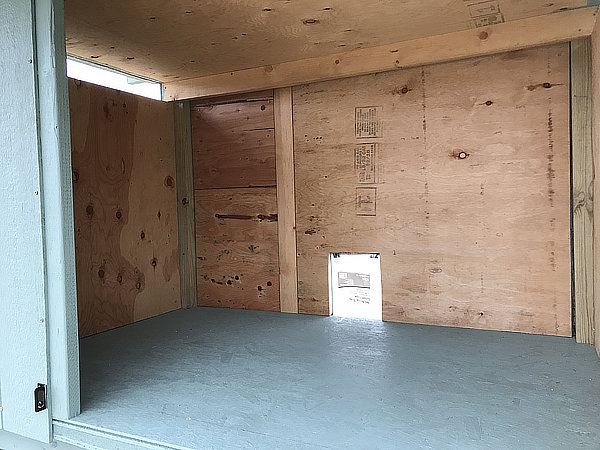
If you look at the bottom left, you can kinda see the sandwich layers exposed where the door closes (its’ painted). For the floor and ceiling of the chicken coop I used a combination of 1/2″ sheathing, 1″ foam board insulation, and 3/4″ AdvanTech sheathing (stiffer and more stable, waterproof).
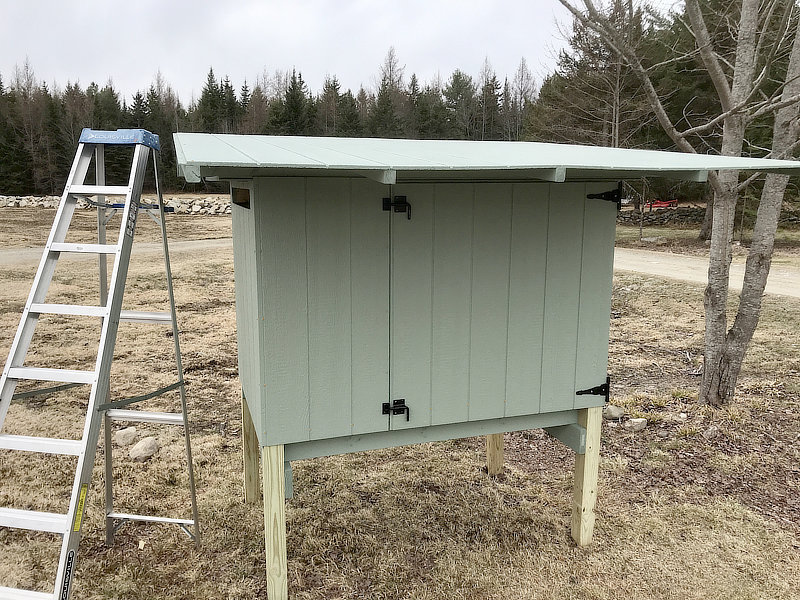
Still a work in progress. Actually it is further along than this, but I’ll save that for another post…
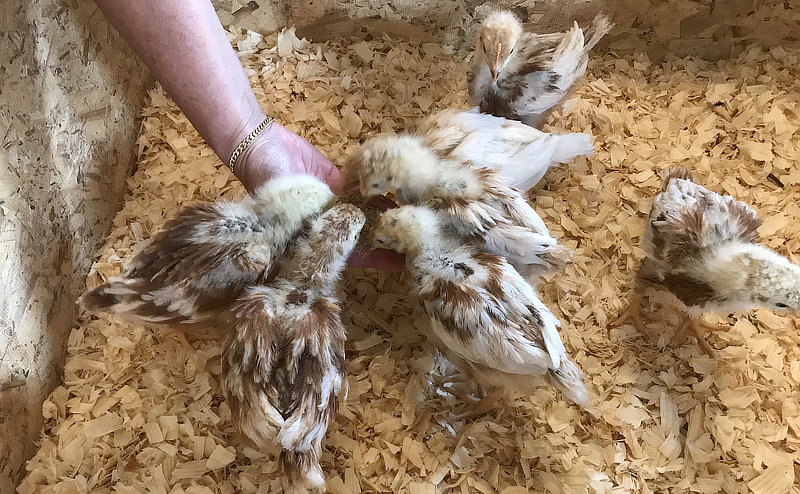
Pullets eating out of Mrs.J’s hands.
We’ve discovered the ISA-Brown’s are very curious and they seemingly enjoy the attention from humans.
Beginner’s Guide To Raising Chickens
(view on amzn)
[ Read: Chickens Flying Out of the Brooder ]
[ Read: My Chicks ]
Ken,
Nice looking coop! As I have mentioned before, make sure that the insulation is completely covered. My experience has been that chickens get bored, and will peck at anything, including insulation. Not good for them.
Roger that. The only exposure left to cover is at the chicken door itself, around its perimeter where the “sandwich” is exposed (left/right/top of door). Need to cut a few small pieces of sheathing or something thin to fasten there and cover it.
Cutting foam is easy with an electric knife, as in “Thanksgiving carving knife”. Hope it helps.
With our MT winters I also did this in the coop. I then lined it with plastic so the chickens wouldn’t peck at and ingest any of the little foam pieces. Seemed to be sufficient for last winter, although it was a milder one. I did not add a light or heat in any way.
We are building our first coop in MT and are trying to figure out insulating it along with safe way to keep chickens from eating it. What kind of plastic did you use? Do you heat the water so it doesn’t freeze? Any help you care to give would be greatly appreciated.
Wow! That is a great idea.
I covered the coop legs on 3 sides to the ground to block wind, snow and rain. They seem to like being outside yet protected.
I have similar winter plans for protecting under the coop, and around the enclosed run to some extent – to keep some of the snow/wind out…
I did the same, covered the bottom of the raised coop with latticework on four sides with a little entry cut out.
This allows the girls to get out of the rain yet still be “outside”.
Also a quick protection from birds of prey which sometimes swoop down for a quick chicken dinner.
Also a nice place to put a “flock block” out of the weather for snacking purposes.
Chickens are sooooooooo much fun.
Yes, parts of the country get insane winds! It can get crazy here from time to time, but I do have a plan…
First, the coop itself is pretty heavy – many hundreds of pounds. But, I will be sinking rebar into the ground (at an angle — not straight up and down) for several locations around the coop/run framework so as to attach/secure.
Since I have not sunk my 4×4’s into the ground and poured concrete, I’m going to tie it down this way. I’ll attach steel cable clamps to the exposed rebar end, and attach/secure in some way to the framing – possibly with flexible 1/8″ cable.
Still working on that thought process…
Nice,
Happy chickens!
nice looking chickens…(still think you have at least one rooster…grin…guess it will be Sunday Dinner, if so)
am sorry, maybe you answered this, as I haven’t read all the chicken articles…but, am wondering if you’ve given thought to protecting the chickens from Varmints? As in maybe digging down a foot or two, and putting some heavy duty mesh/screen on bottom and up all sides to top of roof?..(and of course, put dirt / gravel back)
.Sounds extreme, and may not be needed, but I recall a darn weasel killing every young chicken in our “young chicken coop” way back when. My Dad did something like the mesh thing, and never had it happen again. (it was a huge loss for a struggling farmer…very sad time)
We bought a pre-built “proshed” for our Cluckingham Palace. Placed the nesting box on the mezzanine, and the roasts act as ladders up to that level. By placing the nesting box up a bit, we don’t have to bend over in the debris to collect eggs. The nesting box is designed such that the eggs roll gently to a screened/sheltered dish so that the chickens can’t peck them or crush them by another nesting in the same space (which they LOVE to do!) We use red heat lamps during sub zero weather and that seems more than sufficient. We installed a “doggie door” for them to get to the yard….didn’t take them any time to figure that out! Happy Birds.
My coop is just single layer 3/4 plywood. I have never heated it, in 10 years I’ve never had a problem in winter. We use deep litter method, clean it out in spring and add chips on top of the old all summer and fall… Once we get six to eight inches, that insulates the floor and the birds body heat and decomposing litter is enough to keep them from freezing in the winter. Appropriate breeds for our area are fine down to twenty below with no problem, just don’t put their water inside with them, they’ll get frost bite and could loose toes if they get wet. In ten years we haven’t had any problem…well other than predation.
Ken
One thing you might want to be mindful of are mice and rats nesting between your walls. It’s a perfect place for them to keep warm, and have access to chicken feed at night when the hens are roosting. If there is any opening at all for them to get in there, they will. I made the mistake of not minding the gaps, and found that the mice really enjoyed using the insulation board I used (like yours) for nesting material. The chickens would occasionally get one – extra protein! – but the mice would also get into the chicken feeder at night.
I insulated the walls and ceiling of my well house using a similar product but turned the foil face inside. With an incandescent bulb in the light fixture the building stayed warmish all winter with the light and heat bouncing around. Acts like a space blanket. Recently put a second refrigerator freezer in there, and the compressor keeps it nicely above freezing on colder nights.
My coop is a conventional build but with no insulation in the floor and it is sitting on blocks 16″ off the ground. Normal R11 walls & ceiling… and normal windows. It has an interior solid core door for the people door. Chicken doors are guillotine style. 60w incandescent bulb keeps it 15° warmer than outside and a seed heating mat is what I keep the water from freezing. Chickens do not seem to care as long as it is above 20°.
I use corn cob horse bedding for litter.
The external access nest box doors are just plywood. Sometimes the eggs freeze when it is really cold.
I have a 250w heat lamp on a temperature controller that turns on at 20 and off at 30. Hard on the lamp because it cycles a lot. Only gets used for a couple weeks a year.
Have to agree with previous comment, foil side goes on the warm side. If you want to keep heat in then the foil goes on the inside.
Upon further research about the foil side direction of foam board insulation:
Evidently if it’s sandwiched like I did (foil side right up against the sheathing), there is no benefit (of the foil) regardless of direction. It needs at least a 1/2″ air gap into a air-tight space to gain a advantage.
In retrospect, I would not have changed the wall design (and floor/ceiling) to accommodate a sealed air gap space — too much work and cost for getting about a R-1 addition for the foil.
Oh well, at least I still have about a R-6 or 7 for my birds ;)
Mine isn’t sandwiched. It’s a glittering foil room. Meant to keep pipes from freezing without having a dedicated heat source.
Here winters are relatively mild and birds just need dry, draft-free space at night.
Ken,
I think you have a good design there. Main thing is sealing the construction. “Infiltration” of cold air into any shelter is a very large part of the total heat loss. Up until the 1980s, it was usually about 1/2 of the total heating load. Then they started tightening up the building construction and this lowered to about 1/4 or lower. My point is if you seal the cracks to eliminate cold air seeping in, that is a big part of the battle. Your construction looks really tight from your pictures. Your girls will be fairly snug in there this winter.
Yep,
Foil is a radiant barrier. Thats why on roof sheathing it goes up
At least herein hotsville it does.
🤪
Looks god Ken! We just hatched a few chicks from the incubator (Rhode Island Reds), and picked up 5 Buff orpington chicks from the feed store. I like to keep a few buff in the flock because they are super gentle and will go broody. Hope THEY hatch my chicks next year. Chickens hatch and raise them better than we do. And keep a rooster if you get one. They will protect the hens when free-ranging. Oh, but not the neighbor dogs….grrrrrr!
Those who are constructing chicken coops or needing a boost to their insulation requirements. Look for the product Reflectix. It looks like silver bubble wrap in a roll comes in 24″ & 48″ widths. You place this against the wall you wish to keep the heat or cold from penetration, then add your additional insulation over it. Although it is only listed as an R-3 factor it does make a difference.
We have a couple of metal building on the property, placed this against the wall waited a few minutes then check the difference on the heat factor. It was an lovely 100 degree plus day, and the side without would have burnt my hand, the other side I could feel the heat but it was at a tolerable stage for on the heat index for this material.
Babies arrived this morning! 12 barred rock chicks and 6 bronze breasted turkeys. Our female Schnauzer LOVES the sounds of the peepers and always watches over them each spring! so funny to watch her reactions. Great sounds, brings lots of joy to the whole family.
Pioneer,
Sounds like you have an exciting day in store. I remember back when I ordered up 200 chicks through Gurneys, years ago. Had to pick them up at the post office. wow. got them home and into their new area, kids and dogs running around all excited. Good memories. Enjoy your new chicks!
Yes, I buy a dozen each spring and another dozen each fall to keep the crop rotating. Butcher around 20 each fall and either can them, turn them into dog food or if nice and hefty, freeze them for broiling. We do chickens the same time as the turkeys in the fall. It is a LOT of work. I keep around 55-60 producing eggs at any given time. Good protein!
We also use the deep litter method here in frigid NY or aye Olde Frozen Tundra as my brother calls it. I clean the coop in April when we have the thaw and use the mostly compost around the fruit trees. During the summer, the coop is cleaned out monthly with a final clean right before cold season again. We use hay and the chickens enjoy scratching through it when it is added – usually weekly unless a lot of rain and then I add more in between. We bought a chipper this past year so I hope to start using some chips also.
Our 12 x 16 coop has two good sized windows opposite the perch that runs the length of the coop. The windows have hardware clothe over the opening for good air circulation during warm weather. And a couple ports up high on north and south rafter area to keep the air moving but not blowing on the chickens. The windows face east and our wind usually comes from the west, although we have gotten some good blows from east and south before. For winter and cooler days, I have plexiglass inserts to adjust or close off the air from the windows.
This is an older Amish made coop with hemlock board sides with the thinner boards covering the spaces between 10 in wide boards and tin roof. The north side has a full glass pane door with hardware clothe over the entire outside portion…jic something makes it through our fencing. My spouse reinforced each corner with metal on the outside to keep chewing creatures out from the most vulnerable corners. We used cut young trees for our long perches up high and the “ladder” to get up there.
This coop sits permanently within a 20 by 20 ft. By 6 ft. High Chain link fenced area, which is surrounded by another fenced area. Animals cannot dig under the wire, large rocks were buried around the entire outside and cement blocks were buried under the entry gate.
Our 38 chickens, 3 guinea hens, and 8 ducks all come in each evening to be locked in. They are allowed to free range during the day but generally stay within the few acres surrounding their coop. We do have many predators – both land and air.
Those little guys are so darn cute! Thanks Ken