My Chics and their Brooder
Would you like to follow along? I’m going to post occasional articles on the topic of CHICKENS. We recently picked up 7 chicks with the intent of raising them for egg laying production for our household.
I’m sure that many of you regulars are well established in the arena of raising chickens. However maybe this topic will help other newbies as they delve into raising their own chickens!
BEFORE I got my chics…
Brooder
I needed a “brooder”. It’s the little home for the chics during the first 6 – 8 weeks of life. They can be purchased. However it’s really easy to build your own brooder if you have some materials lying around. Here’s how I did it…
BROODER WALLS / SIDES
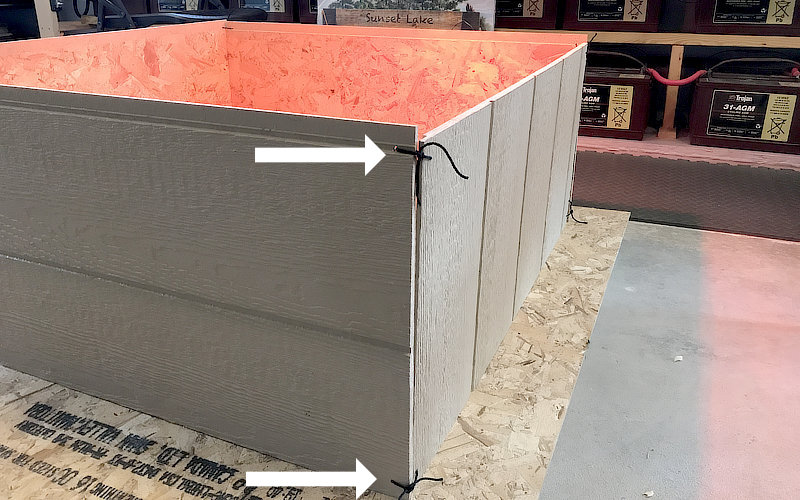
I had some leftover “SmartSide” siding that I used for the garage/shop that I built a few years ago. You can use – whatever… sheathing? plywood? Anything that’ll accommodate the walls.
See those arrows in the picture above (brooder walls)? All I did was drill holes in each corner (top and bottom) so that I could pull a string through it to fasten the sides together. That way, it’s easy for disassembly once I’m done with the brooder.
I used Tarred Twine (love that stuff, it’s like waxed twine) (view on amzn).
The assembled walls simply sit on top of a flooring board (no need to attach).
The height of the brooder is about 16 inches. Each side is about 3 feet. PLENTY of room for just 7 chics. Actually, it’s probably more like a McMansion for them!
BROODER FLOOR
A 4′ x 4′ leftover cut sheet of 3/4″ AdvanTech flooring did the trick. Use any plywood, sheathing, whatever.
HOWEVER, Do keep it insulated from a concrete floor. (Too cold for the birds). They could die without adequate heat (see “heat lamp” below).
I happened to have some leftover 2″ foam board insulation which I set the flooring upon. You can use just about anything. Even a throw carpet. Just try to keep the brooder floor off of the concrete itself (if it’s in a room with concrete floor, like your garage, etc..).
PINE SHAVINGS
My research revealed (at least to me) that the best choice is large pine shavings. Readily available at Tractor Supply (or wherever you get such supplies in your community). We dumped in about 2 inches worth. After the first week we scooped it out and changed it – though we could have gone longer it seemed. It’s cheap enough, so no big deal.
HEAT LAMP
The little chics need to stay warm! They say 95 – 100 degrees as measured by a thermometer underneath the heat lamp – on the floor bed (some say 2″ above the floor). Here’s what I did:
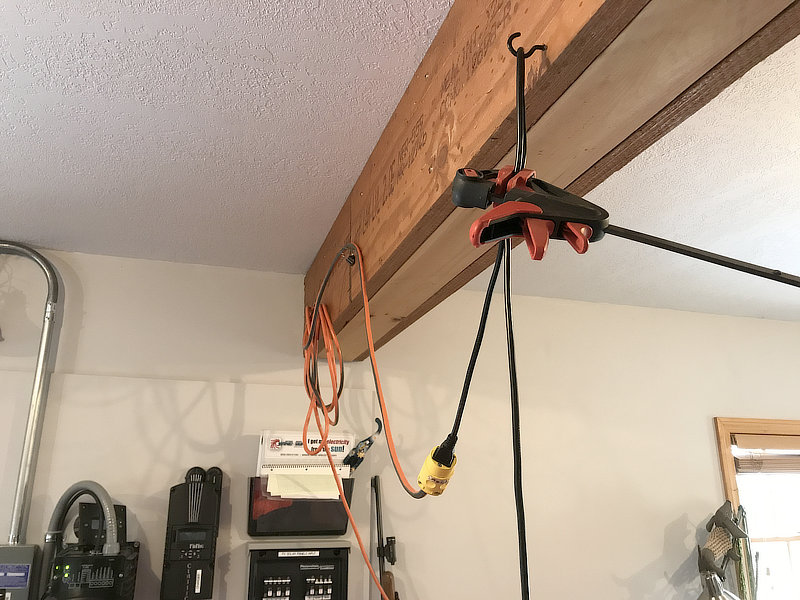
I bought a 250 watt red heat lamp bulb (and a spare, just in case). AND a SPECIAL lamp holder with a porcelain socket. Why porcelain? Because the lamp base gets hot, so it’s better. Here’s a picture:
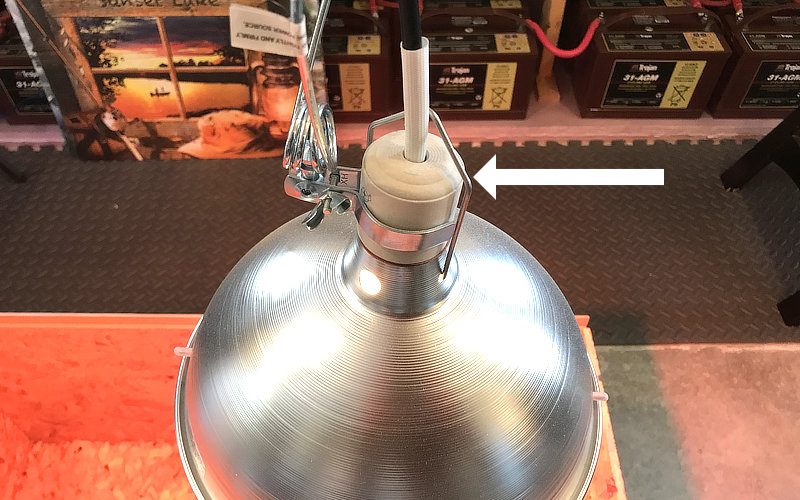
I started with the lamp about 20 inches above the pine shavings bed. Your height may vary, but use a thermometer (like this one, for example) and place it on the pine shavings bed. Let it sit for awhile and check the temperature. Then adjust the height of the lamp to get it around 95-degrees-F for the first chic week.
The adjustment depends on your mount method. I hung mine from the ceiling and used a clamp to hold the cord in whatever position I needed. It made it easier to adjust the height as time went on. A picture is worth a thousand words, so here’s a photo:
You’re supposed to decrease the temperature by 5 degrees each week until you eventually reach ambient room temperature.
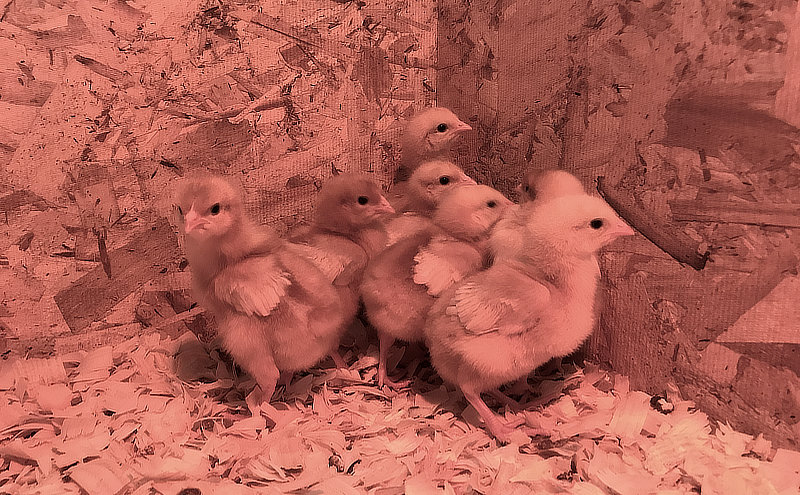
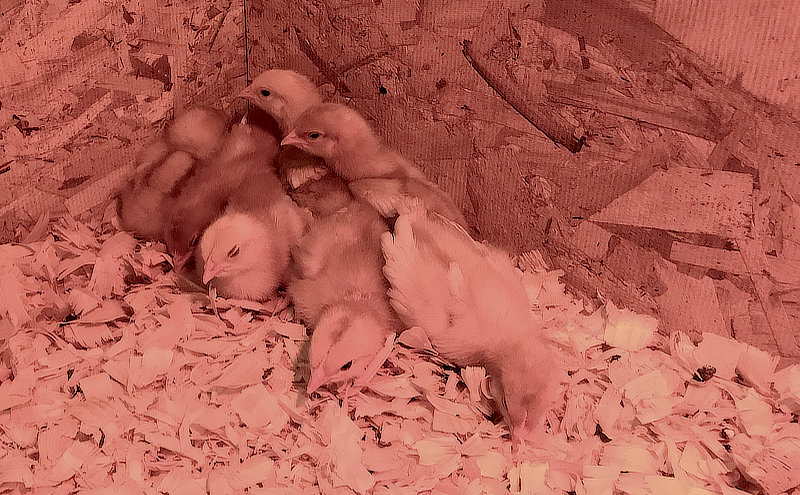
The chics tend to huddle together a lot. That’s normal. They’re sharing body heat.
TIP: If the temperature is too hot for them, they will consistently move away from the lamp to another corner and stay there (except when they’re eating or drinking).
TIP: Don’t put the heat lamp in the middle. Instead favor one end or the other. This allows them to move away from the heat if they need to.
Here’s a picture of my “ISA-Brown” chics in the corner. A few of them napping:
WATER TROUGH AND FEEDER FOR BABY CHICS
They make small feeders and waterers specifically for chics.
WATER:
Let me start with the water. When you fill it, fill it with WARM water initially. Approximately 90 – 95 degrees-F. Check with a meat probe thermometer while holding it under the faucet tap as you adjust. This way, the chics don’t get cold (as they would if drinking cold water).
TIP: When your first put your chics in the brooder, immediately dip their beak in the water trough. It lets them know where the water is. When I did it, they all started drinking right away. By the way, when they drink, they’ll take some in their beak and then lift their head back to swallow it down. Cute.
Change the water every day.
FEEDER:
Now the feeder. Use the special chick food. There are different foods depending on their stage of life. Available at your Tractor Supply Store. They LOVE to EAT. Oh my…
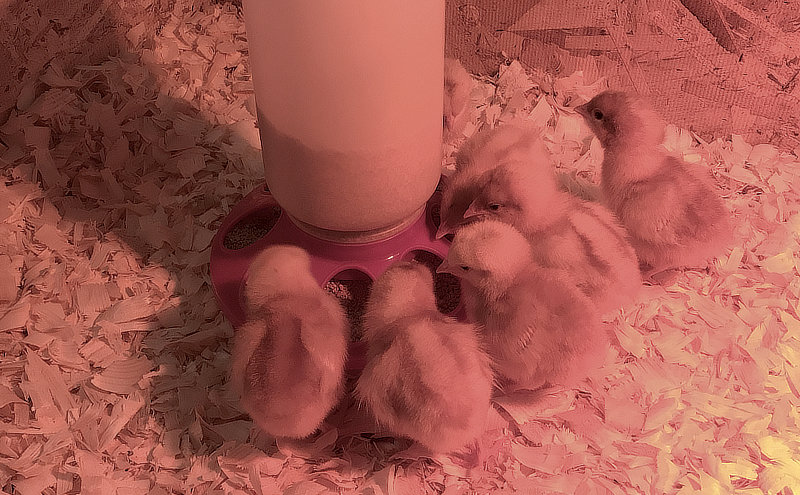
Let me tell you something. It’s is hilarious to watch these birds! I have 7 chicks. The feeder has 8 openings. But they tend to all want to eat from the same several openings (depending on whoever got their first). They’ll squabble over it and jump on each other, etc.. Too funny.
TIP: Put some sort of cardboard, or whatever under the feeder and water trough. Helps keep pine shavings out of the water, and it catches some of the food that they sling out.
Speaking of slinging food (with their beaks), these darn chicks can be wasteful! They were using their beaks to purposely sling food out of the trough! Apparently it’s called “billing”. So I outsmarted them… Instead of filling the feeder container as you normally would, we just put in enough to get about half way up the trough. Now it’s harder for them to toss all that food out. The little buggers…
This is before I had a tray, and while I was still filling the feed container (instead of half filling just the trough itself).
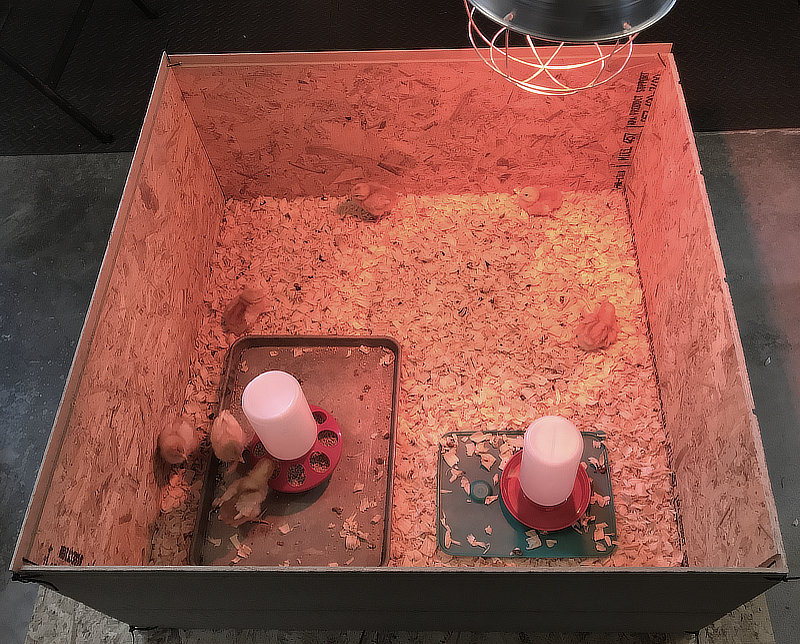
Here’s a picture of the whole brooder:
BE CAREFUL IF YOU HAVE A DOG
So, we have a mini Dachshund. As you can see in the following image that he is VERY INTERESTED in these chicks. I was sitting in a chair holding him in my lap, and he was making very funny noises as his senses went on overload:
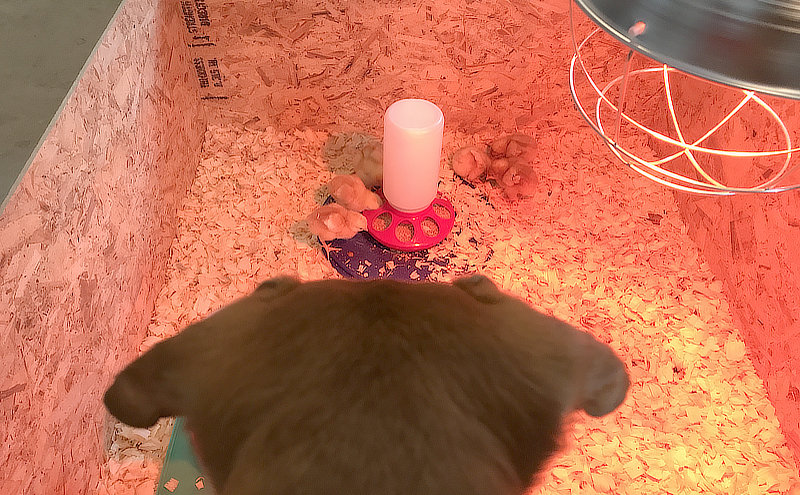
He is drawn to their “chirps” and “cheeps”, so we’re keeping the door closed to this room downstairs. Mrs.J tried holding a chick at a safe distance from Sampson (as I held him) while trying to introduce the new chics. Well, Sampson nosed closer (as I held him), and then semi-snapped at it (though safe distance away). Anyway, instincts kick in I suppose, as this breed was bred to hunt badgers… Oh well.
Eventually they will all be in the coop and run area, safe and sound (if I do it right).
Okay that was the first episode on my chickens. Stay tuned for more fun as it develops…
By the way an excellent book on raising chickens is this one, Storey’s Guide to Raising Chickens. We purchased it awhile ago (3rd edition), though now up to 4th-edition, and it has been a great help. Lots of information! Plus there’s plenty of online information when you begin searching for it.
Beginner’s Guide To Raising Chickens
(view on amzn)