DIY Olive Oil Lamp Instructions – Make Your Own Vegetable Oil Lamp
I made this diy olive oil lamp years ago. I was curious. You might simply call it a vegetable oil lamp.
The diy project was fairly easy, and best of all it actually worked!
Olive Oil – Vegetable Oil for a DIY Lamp
All oil will burn at their own unique flash point temperatures.
One reason that olive oil is a good choice for cooking is because it has a high smoke point (~400 degrees-F), a high flash point (600 degrees-F), and a high auto-ignition temperature (815 degrees-F).
The concept of burning vegetable oil (e.g. olive oil) inside the home rather than petroleum based kerosene seems more appealing, less toxic, and safer.
The Romans and other ancients regularly burned olive oil in their lamps, so, the concept is sound.
Pure olive oil will not produce smoke as it burns, while other types of vegetable oils may produce some residual smoke while burning.
How Much Vegetable Oil or Olive Oil Does The Lamp Use?
My DIY olive oil lamp consumed 2 ounces (1/8 cup) in 5 hours.
It will depend on wick size (flame size and corresponding oil consumption).
Olive Oil Lamp – Safer than Petroleum Fuels
Olive oil is not nearly as readily flammable as petroleum fuels (for example, it will take longer to light the wick). If the olive oil lamp is spilled, the oil will not ignite like a petroleum fueled lamp certainly will…
The flash point of a material is a good indicator of how likely it is to catch on fire if there is an ignition source nearby. At the flash point, the material will have just enough vapor available to support a flame. The lower the flash point, the more of a fire danger the material is.
Flash point of Kerosene: 100°F
Flash point of Olive Oil: 600°F
Auto-ignition temperature of Kerosene: 428°F
Auto-ignition temperature of Olive Oil: 815°F
CAUTION: As with any open flame, use care and caution. Respect the flame!
The author assumes no responsibility of any resultant fire.
Common sense required.
You’re going to need some vegetable oil lamp wicks:
>> Wicks for your project
(view on amzn)
DIY Olive Oil Lamp Instructions
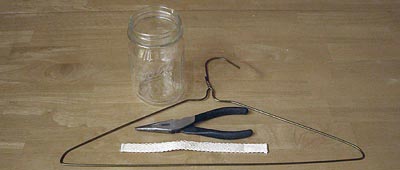
You will need an ordinary metal coat hanger, a wick, a canning jar (these are heat treated and can withstand the hot temperature), and needle-nose pliers. I used a wide mouth canning jar (easier access).
The wick shown in this photo is a typical kerosene lamp wick. Using a scissors, I cut the wick in half (length wise) so it wouldn’t be as fat as what is shown in the photo.
TIP: A coat hanger is somewhat difficult to work and bend into a coil, while an easier approach is to use #12 gauge bare copper ‘ground’ wire, available at most hardware and ‘big box’ stores. It’s softer and easier to work with.
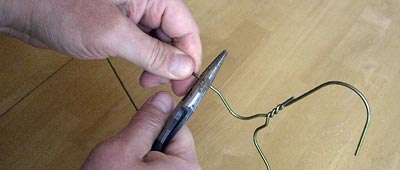
Grip the pliers firmly to the metal wire of the coat hanger and twist back and forth until the wire snaps.
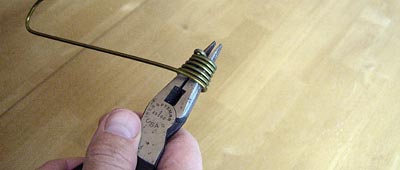
Using the needle-nose pliers, grip the end of the wire and then wrap the wire around the pliers about five times around. Do this somewhat loosely so as to make it easier to slide the wind off of the pliers afterward.
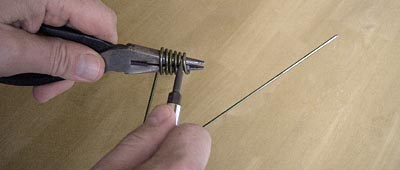
Use a screwdriver to assist in pushing the wound wire off of the pliers.
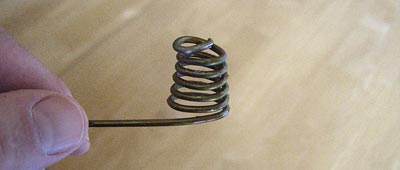
The wound wire will serve to hold the wick.
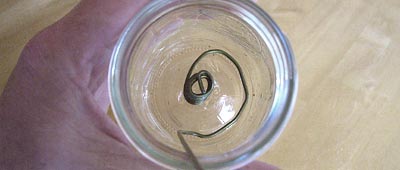
Form and bend the wire while using your pliers to shape it such that the wound portion of the wick holder from the previous step will sit on the bottom of the jar, in the middle of its diameter as shown in the photo (looking down into the jar). Bend the rest of the wire up the edge of the jar so you can form a handle to support it on the jar’s lip edge. Refer to the final side view image of the olive oil lamp.
Bend back the top portion of the wick holder. This will allow the wick to point somewhat upwards when we insert it later.
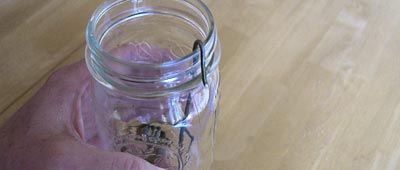
Form a hook to hang over the edge of the jar as shown.
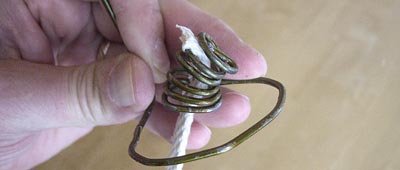
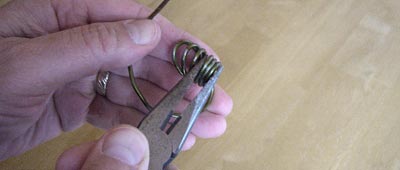
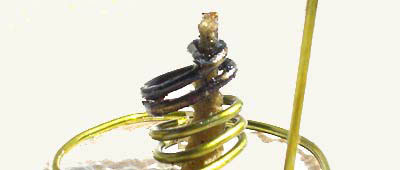
Pry apart one of the upper winds so that the wick will slip through as shown.
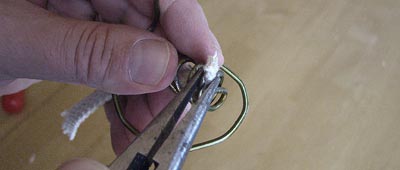
Once the wick is through the wire, pinch the wire enough so the wick is ‘just’ secure and won’t fall back through. Not too tight though, or you won’t be able to easily feed the wick later – after it burns some…

Trim excess wick. Too much wick and the flame will smoke. Too little wick and the flame will be small.
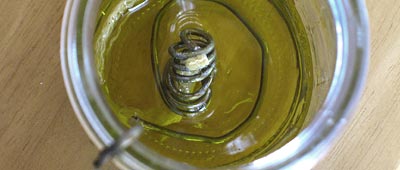
Fill the jar with pure olive oil to a level part way up the wick holder. Pour the oil over the top of the wick to speed up the soak.
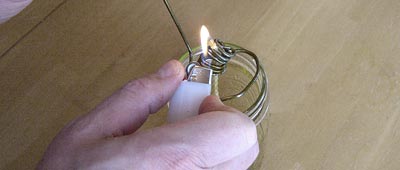
After the wick is fully absorbed, light the wick. You will notice that olive oil is not nearly as readily flammable as petroleum fuels and will take longer to light. This very fact assures that if the mixture is spilled, the oil will not ignite.
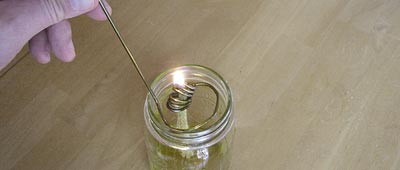
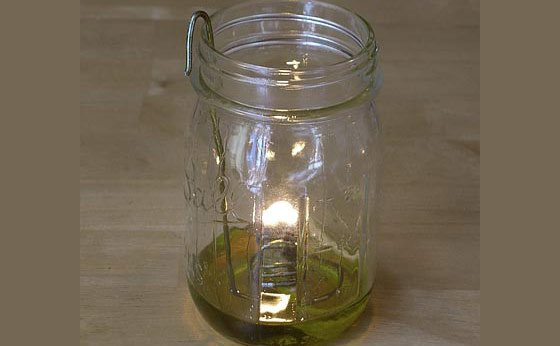
Insert the flaming wick assembly back into the jar.
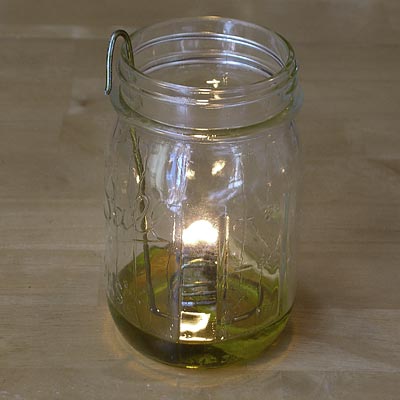
Enjoy the lovely soft flame of your olive oil lamp! Pretty neat, yes?
SAFETY:
As with any open burning flame, use care and caution.
Respect the flame!
The author assumes no responsibility of any resultant fire.
Common sense required.
Update:
Alternatively, you may feed the wick all the way through the center of the coil as pictured, with the last spiral pinched tight enough to hold the wick, but not too tightly.
[ Read: Fire Extinguishers: 3 or More Locations for House Fire Preparedness ]
