Making Cheese
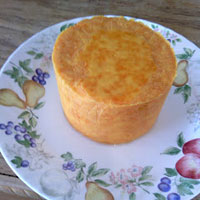
Preserving Milk by cheese-making…..
Colby Cheese
Guest post: by Christine Coburn
Cheese has been around for centuries as a way of preserving milk without refrigeration. The starters will last several years in the freezer and the rennett tabs also have a super long shelf life if kept cool. It can be made with raw milk or pasteurized milk. I use the raw milk fresh from my goats. It does not have to be cows milk.
While this may not be something many people would want to do on a regular basis since it is so much easier to go to the store and buy a chunk, if that store is not around it would be a good thing to have practiced a little and know how to do. I really enjoy making it. It is quite fulfilling to see my family and friends munching on the cheese I made and telling me how good it is.
Also the difference in quality between store bought (plastic cheese as I call it) and Artisan cheese is huge. To this date I have made Parmesan, Ricotta, Cheddar, Pepper Jack, Mozzarella and Now Colby.
Home Cheese Making: Recipes for 75 Homemade Cheeses
I just made Colby cheese from the milk of my goats. It is really nice as you do not have to wait for months or even years for it to age. I made this and 3 days later we were munching on it. At first it is still squeaky to eat but as it has aged a few more days the squeaky feel went away. It has a wonderful texture, grates easily, melts smoothly and tastes great.
Equipment you will need:
Large thick bottomed pot
Laboratory thermometer
Long handled spoon
Colander
cheesecloth
cheese press
Bamboo cheese mat
Wax (optional)
This is how I made it:
Ingredients
2 gallons of fresh goats milk
50 drops annatto coloring
1 pkt Mesophillic starter
1/4 tsp vegetable rennett
Saturated salt brine
Sanitize your equipment.
Pour milk into a thick bottomed pot and add the coloring. Bring the temperature to 90 degrees. remove it from the heat. Add the starter. Sprinkle it on the top of the milk and then wait 2 minutes for it to rehydrate. Then stir it into the milk very well with an up and down motion making sure that every square inch of the milk has been agitated with the starter. Cover and let rest for 45 minutes.
Check temperature. It should still be at about 90 degrees. Dilute the Rennett in 1/4 cup of cool water. Then mix this solution into the milk. Replace the lid and allow to set another 45 minutes.
When your curd is set so that you get a clean break. Cut into 1/2 inch cubes with a long thin knife. Wash your hands and arms well and reach into the curds and pull up the bottom ones to make sure they are cut small. They can be smaller than 1/2 inch but no bigger. Cut them smaller if you need to. Do not crush, squeeze or mash the curds.
Cook the curd. You must bring the temperature very slowly up to 104 degrees. I set my electric stove all the way down on low. You want to raise the temperature over the course of about 45 minutes. Then remove the pot from the heat, cover and let rest 15 more minutes. Make sure you stir the curds every few minutes so that they do not stick together. If you forget you will have one huge mass of curd! They should fall to the bottom of the pot.
After you have cooked your curds pour the whey off carefully down to the level of the curds. Then replace with the same amount of water. The cooler the water the moister your cheese will be. I used 100degree water as I wanted a cheese with the same texture as store bought cheddar. Mix it well with your clean hands so that all of the curds are well rinsed.
Line a colander with cheesecloth. then pour the off the water and then pour the curds into the colander. Let it sit and drain for about 15 minutes.
Line your cheese press with a clean cheese cloth and place the curds into the press. Press at 10lbs for 15 minutes.
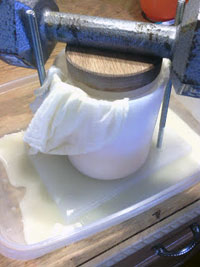
Press with a 10lb weight on top
After about 15 minutes remove the cheese from the press, turn it over, redress with cheese cloth and place back into the press.Press it at 20lbs for 30lbs then remove flip and redress
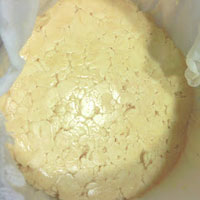
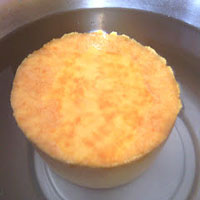
cheese in press after the 20lb pressing
Back into the press at 40lbs for 2 hours
Remove flip and redress (get the routine)
Back into the press at 50lbs overnight.
In the morning remove the wheel of cheese from the press and carefully peel off the cheese cloth. Then put the wheel into about a gallon of saturated salt brine. (About 2lbs of canning salt to 1 gallon of water. Do NOT use iodized salt)
Just flip it over every couple hours.. You can let the cheese float in the brine for 8-24 hours depending on taste. I let mine soak for 8 hours and it was not salty enough for me.
Then place a bamboo cheese mat on a plate and place your cheese on that to dry off. This will take a day or two.
Now at this point you can either choose to eat it or wax it and age it. We chose to break it open. It will taste wonderful at this point but the cheese will still squeak when you chew it.
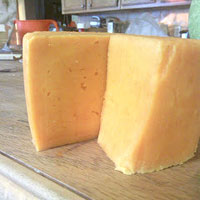
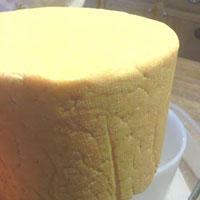
See how pretty the color and texture is.
After about a week of aging the squeak will go away.
Or you can wax it at this point and age it for as long as you wish. The longer you age it the sharper it will be. If you eat it about a week after you make it then the taste will be like that of store bought Colby. The longer you wait the more like Cheddar it tastes.
Among the highest priorities for survival is safe drinking water.
AlexaPure Pro Gravity-Powered Water Filtration
Tested against NSF/ANSI 53, NSF/ANSI 42


