55 Gallon Drum Water Storage Barrel | How-to Clean & Store For Emergency
It’s a smart thing to do. Emergency Water Storage in a 55 gallon water barrel / drum (or any size!). It is practical, reasonable preparedness.
UPDATE: It’s currently the Fall season (again). It’s the time of year when I typically replace the water in my 55 gallon drum long-term water storage barrels. And I’m doing it again today. Although the water inside is likely fine, I empty and then refill the drums anyway. Keep reading for how I treat them for long term storage. Republished for your encouragement…
Today I filled up and treated another 55 gallon water barrel for long term storage. Why? For emergency drinking water (or any other necessary water use).
There are many size water containers for storage. Various designs. Some, clever (stack-ability). I am writing this post today, clarifying how I clean / sanitize them first, and treat the water afterwards – including a 55 gallon drum. Also to show you a unique stackable water storage container (bottom of post).
I will let you know how I clean my 55 gallon drum for water storage. And, recommend a 55 gallon water barrel (below).
Water Storage Barrel /Drum
A backup emergency supply of water! It’s one of my highest recommendations for general preparedness.
I have several food grade barrels that originally stored some kind of food (I believe it was olives). Later the 55 gallon drums were repurposed for rainwater collection – which is how I bought them. Instead, I am using them for emergency water storage.
My home relies on well water. Actually it’s pumped up from a natural spring via a ‘dug well’ at the spring’s location. In the event that my well pump goes bad, I will have some water on hand to use in the house. I could keep the drums filled by hauling water from my spring back up to the house, and filling the drums for usage – until repairs can be made.
The repair could take awhile. So, better safe than sorry, right? Also, it’s just good preparedness in general. We cannot survive very long without any water!
I am fortunate in that my water source is from a natural spring here on the property. It produces about 7 – 10 gallons per minute, year-round. If I needed to, I could always walk down there (to the spring) and collect water in a container via the spring’s overflow spout. Then haul it back to the house to keep my 55 gallon drums filled. Note, that would be a major chore – given that water weighs 8 pounds per gallon and the source is about 600 feet from the house! Yard cart? Better yet, my ATV towing its utility trailer (grin).
UPDATE: TIP: If I lost my well pump during the winter, it would be quite more of a challenge (lots of snow here). So I believe I have that covered, just in case… I have purchased a “Jet Sled” (similar to this one on amzn) (bought it at Bass Pro Shop). It’s perfect for hauling a wide variety of things and has many uses. I could slide it across the snow while pulling it. Or better yet, pull it with a rope from my snowmobile back and forth to the house.
This is one of the many various water containers that I have. Good for transport, camping, or general storage. Incredibly popular:
Aqua-Tainer 7 Gallon
(view on amzn)
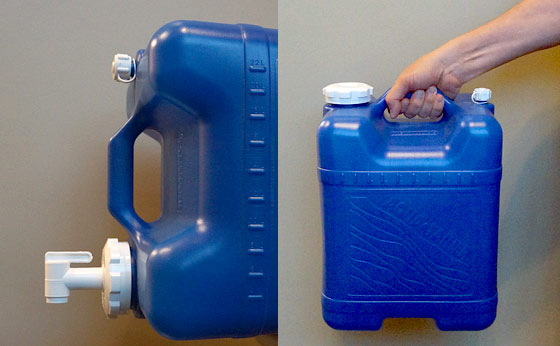
I wrote about it here:
Practical, Portable, Drinking Water Storage Container
In any event, regardless of your own unique situation, by keeping a water barrel filled – you will have an emergency source for drinking. Or filling a toilet tank for flushing. Or washing dishes, etc.. during an emergency.
Where To Keep Water Barrel Storage?
It’s heavy! Especially a 50 or 55 gallon drum! So be aware of that.
One ideal location is to keep it in the basement (if you have one). It doesn’t require much room (figure about a 3’x3′ footprint). Plus, the temperature there will be fairly stable and cool.
If you don’t have a basement, maybe you can clear a spot somewhere on the 1st floor slab. You might consider your garage if it doesn’t freeze in the winter (an attached garage?).
Wherever you decide, remember that a 55 gallon barrel filled with water will weigh more than 400 pounds – so you won’t be moving it afterwards unless you drain it.
Food-Grade | BPA-Free
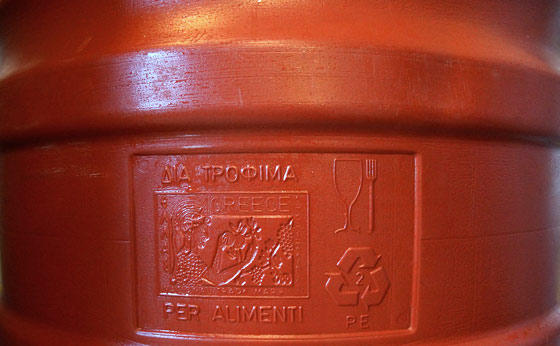
Get a barrel that is food grade. For example, if you look at the picture above (of my barrel) it clearly indicates the symbol icon for food grade. If you purchase a barrel specifically designed for emergency water storage – it will almost certainly be food grade (just check).
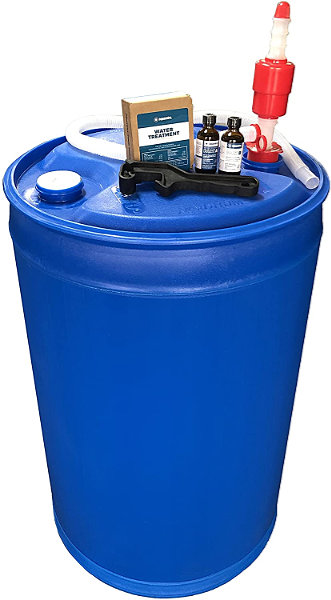
Augason Farms 55 Gallon Water Barrel
The following 55 gallon water storage kit from Augason Farms is very popular.
Emergency Water Storage Kit
(view on amzn)
How to clean a 55 gallon drum for water storage (sanitize)
Don’t use a barrel that stored any type of chemical! Rather, either a new BPA-free food-grade barrel, or, one that previously stored some sort of food product (that can be cleaned).
Clean and disinfect the inside of the barrel. First wash the inside with soap and water until there is no visual evidence of organic contamination. I really like Dawn Platinum dishwashing detergent (amzn) the best. That stuff is great…
Next, disinfect with a bleach solution. Bleach is commonly mixed with water for use as a disinfectant to kill germs. It is well established and recommended to use a 200 ppm (parts per million) solution for cleaning /disinfecting food-contact surfaces (Note this is not the same formula for drinking water purification). Don’t worry, I’ve done the math… Check the link below.
Mix 3 teaspoons regular household bleach with one gallon of water (either in a separate bucket first, or add the 3 teaspoons directly in the barrel to be cleaned – with a gallon of water).
Swish it around in the barrel. The idea is to get the solution sloshed over all the interior surface. Maybe roll it around. Whatever you need to do…
Then let it sit for 30 minutes before dumping it all out. No need to rinse afterwards.
Tip: Be careful because bleach will permanently stain your clothes!
Again, this bleach solution is for sanitizing container (NOT drinking water purification).
[ Read: Bleach – Water Ratio For Disinfecting ]
Pick a spot for your barrel, then fill it…
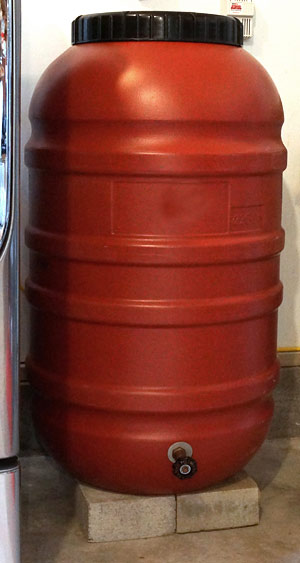
My water barrels have a spigot near the bottom. So I set the barrel up on concrete blocks to facilitate fitting a container underneath to collect water if and when I need it.
I didn’t really need to do that. Because even if directly on the floor, I could also attach a water hose to the spigot. It would be nice to have a short hose just for that purpose.
Note that you can get hoses which are safe for drinking water (designed for RVs and campers).
Some emergency water storage barrels come with (or you can purchase separately) a hand pump for extracting the water (no spigot on the bottom).
Fill-er up
Next, fill the barrel with your tap water. If you have municipal water, it will already be treated with chlorine to a level of about 0.5 ppm (a small amount), but apparently just enough to eliminate most harmful organisms. So you don’t need to be concerned about treating the water yourself for long term storage.
If you’re using untreated water (such as well water) or any untreated source, I would treat the water for possible organic contaminants for safe drinking later, if needed.
I will be using regular bleach (unscented – no additives except for sodium hypochlorite).
How To Treat Water For Emergency Long Term Storage
To treat water that has not yet been treated:
(numbers rounded for convenience)
The following will initially provide about 6 ppm chlorine. This will decay upon any interaction with organic matter. It will also simply naturally decay over time. But that’s okay, because your water storage barrel will be closed. No contaminates getting in? Then you’re A-okay.
This is not a very big deal. But regular bleach comes in mostly two concentrations of “sodium hypochlorite”.
- 5-6%
- 8.25%
These concentrations slightly change the formula. Again, not a particular concern here. But for the sake of accuracy, here’s how much regular bleach to add with water…
Regular Bleach containing 8.25% Sodium Hypochlorite
1 Quart water, 1 drop bleach
1 Gallon water, 6 drops bleach
5 Gallons water, 1/4 teaspoon bleach
10 Gallons water, 1/2 teaspoon bleach
55 Gallons water, 3 teaspoons bleach
[ Read: How Much Bleach To Purify Water ]
Regular Bleach containing 5 – 6% Sodium Hypochlorite
1 Quart water, 2 drops bleach
1 Gallon water, 8 drops bleach
5 Gallons water, 1/2 teaspoon bleach
10 Gallons water, 3/4 teaspoon bleach
50 Gallons water, 4 teaspoons bleach
How To Store Water For Emergency Long Term Storage
After treatment, be sure that your water barrel is sealed (lid on securely).
You might label container as “drinking water” and include storage date.
Keep stored water in a place with a fairly constant cool temperature.
Do not store water containers in direct sunlight.
Do not store water containers in areas where toxic substances such as gasoline or pesticides are present.
I recommend that you drain and refill (and re-treat) your water containers every once a year if you can. That’s what I do. It’s generally not necessary (if treated, sealed, and stored properly). However it is good insurance (just in case) while being fairly easy to do, and will ensure quality water if you ever need it.
Stackable Water Storage
Earlier I mentioned how I came across a unique design. What makes it unique? You can stack one on top of the other. And, it’s made in the USA.
5 Gallon Samson Stackers
(view on amzn)
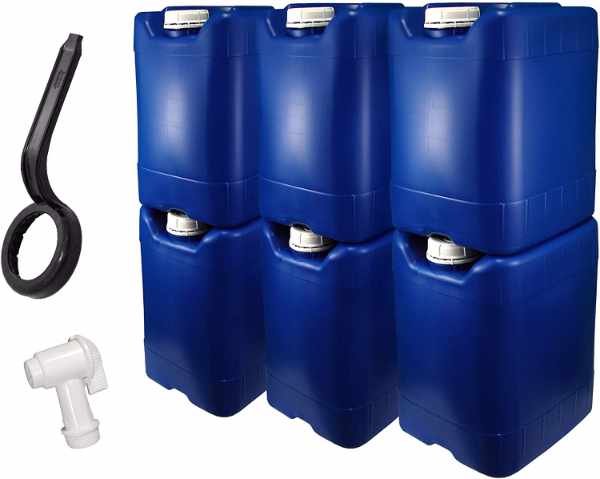
30 gallons of water storage on a approximate 3 square foot footprint.
- PORTABLE: Drums are great but you can’t take them with you. Compact storage in handy 5-gallon units. Garage to pickup to kitchen counter to campsite, your emergency water is now a portable resource.
Purify your water:
And last but not least, it’s always a good idea to filter the water before you drink it. As most of you know, the Berkey countertop water filter system is one of the best. I’ve been using them for more than a decade:
Among the highest priorities for survival is safe drinking water.
AlexaPure Pro Gravity-Powered Water Filtration
Tested against NSF/ANSI 53, NSF/ANSI 42
