How To Make Your Own Mayonnaise With Avocado Oil (or Olive Oil)
Make you own mayonnaise! It’s easier than you might think. Here’s how to do it…
First a quick note. Why do we make our own mayonnaise? Because we control the ingredients. We can choose healthier oils. And as a bonus it costs less than buying it ready-made.
Regular store-bought mayonnaise might contain less-than-healthy ingredients. Especially the oils that are used. Typical Hellmann’s has Soybean oil as the number one ingredient. I’ve even seen Canola oil in some mayo! (not too healthy!)
Well, oil will be the #1 because that’s what’s mostly in there… However I wanted to use Avocado oil or Olive oil instead. Preferably Avocado, which is great for the “Keto” way of eating. Plus believe it or not, lots of these mayonnaise’s have sugar in them too! (There’s seemingly sugar in just about everything these days).
Anyway, instead of paying the big bucks for store-bought Avocado Mayonnaise (which also has other not-so-good ingredients) I decided to make my own.
First, here’s how I’ve made homemade mayonnaise with avocado oil. After that, I’ll show you another recipe (and video) that works with an ordinary blender (found it online).
How To Make Your Own Homemade Mayonnaise With Avocado Oil
Here’s the ingredients you’ll need. I’m making 1 cup of mayo, using Avocado oil.
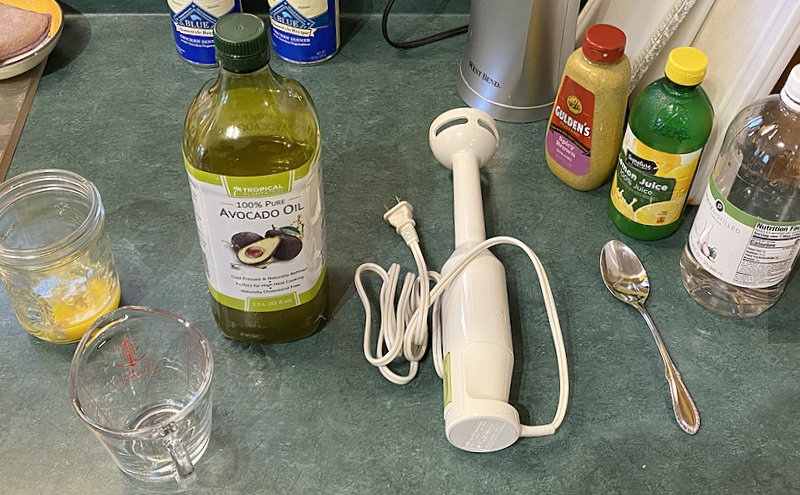
Ingredients
- Avocado oil
- Vinegar
- Mustard
- Lemon Juice
- An egg (see below for DIY pasteurization)
- Salt
- Wide Mouth canning jar
- Submersible Immersion Blender
Directions to Make Mayonnaise
Let the egg, mustard, and lemon juice get to approximate room temperature. This will probably take about 2 hours. Better mixing that way…
Okay, it’s important to add ingredients in the proper order. More accurately stated, the oil should be last.
- Egg (1)
- Mustard (Tablespoon)
- Lemon Juice (2 teaspoons)
- Vinegar (2 teaspoons)
- Salt (3/4 teaspoon)
- Oil (1 cup)
Note: When I first made this, it was recommended to start with half the quantity of Mustard and Vinegar. This is all obviously subject to your own tastes! So, experiment to your hearts content…
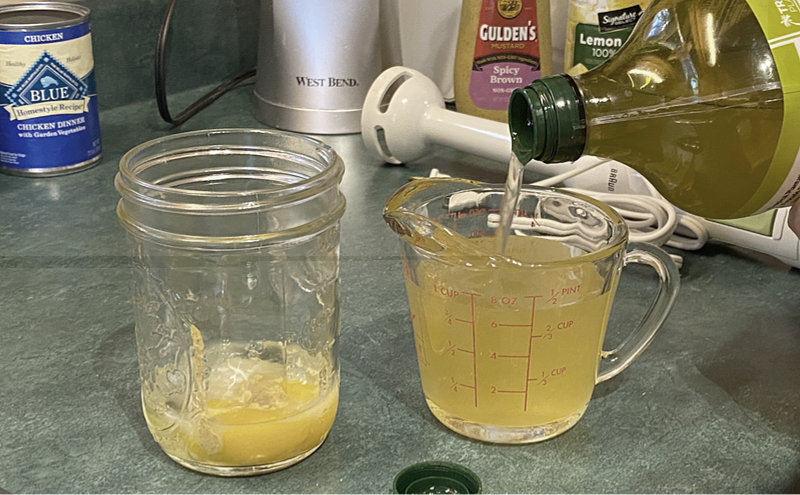
Here you can see I’ve added the egg, mustard, lemon juice and white vinegar. And now I’m filling a measuring cup with 1 cup Avocado oil. Obviously you could be using Extra Virgin Olive oil if you prefer.
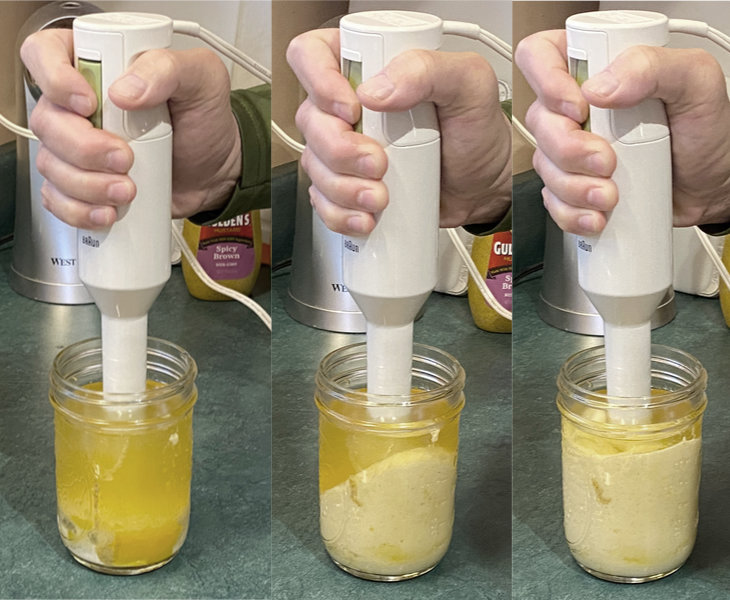
Place the Immersion Blender all the way to the bottom. Don’t worry, it’s not going to splash.
Here’s the trick… Start the blender, and then as it magically turns into mayonnaise, slowly LIFT the blender off the bottom and up further towards the top. This will allow the oil that’s sitting on top to mix in more readily.
After you’ve done that, there will still be some oil on top. So just play around with the mixer till it’s blended in. It won’t take very long with this type of high-speed submersible blender.
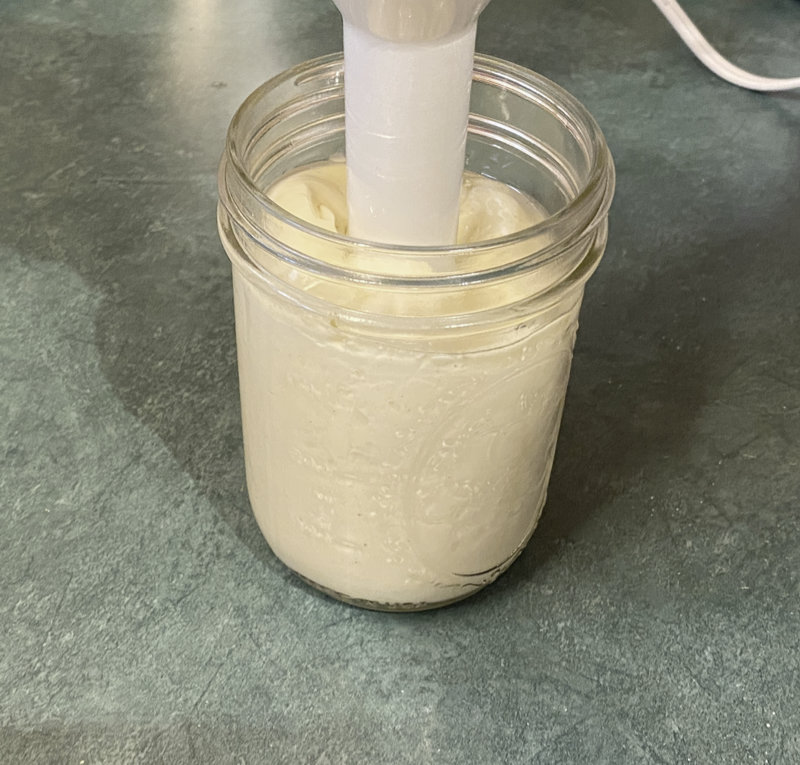
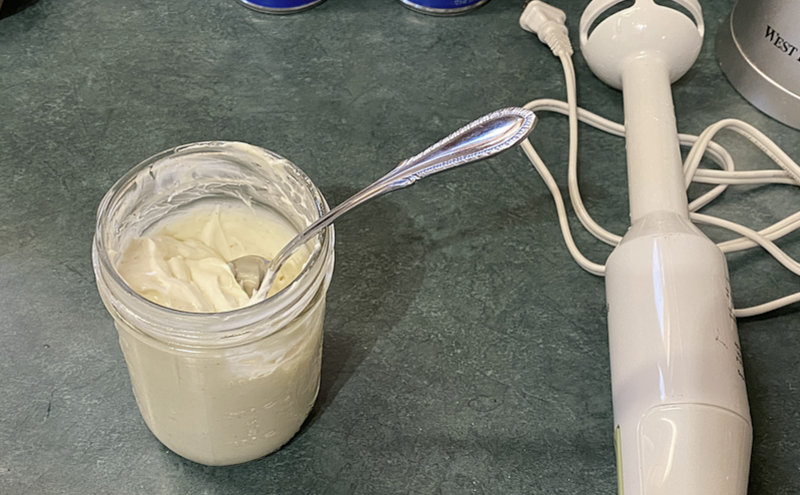
Homemade Mayonnaise! WhooooWeee! That sure looks good!
Kudos to Mrs.J for taking pictures…
Using A Blender To Make Homemade Mayonnaise With Avocado Oil
I found this from someone named “Dr. Julie”
Ingredients, Recipe, and Video Instructions:
Fast and easy homemade mayonnaise!
1 cup avocado oil
2 egg yolks
1 1/2 tbsp apple cider vinegar
2 tbsp lemon juice
1/2 tsp ground mustard
1/2 tsp salt
How Long Homemade Mayonnaise Will Last In The Refrigerator
The good thing about making your own mayonnaise is there are no chemicals in it. No preservatives.
As a result, it won’t keep as long as store bought mayo.
1 to 2 Weeks.
Tip: Put a piece of white tape on the lid and use a sharpie to mark the production date.
Pasteurize Eggs – How To Do It Yourself
There is a very small chance that raw eggs contain salmonella. Pasteurizing is the process of gentle heating to kill food born illnesses. So it’s generally good practice to pasteurize if using raw egg in a recipe that doesn’t include “cooking” such as homemade mayonnaise for example.
You can do your own online search. But the directions are all pretty much the same…
The pasteurized eggs will still have the consistency of raw eggs and can be stored in the refrigerator after pasteurization.
Start with room temperature eggs.
STEP 1 – Place the eggs you want to pasteurize into a medium-sized saucepan in an even layer. Cover with water so that there is 1″ of water above the eggs. Then remove your eggs. You don’t want them in there until your water is at the right temp.
STEP 2 – Heat the water to 140ºF using a digital thermometer to accurately monitor the temperature. Any warmer than 142ºF and you’re going to cook your eggs.
STEP 3 – Place your (room temperature) eggs in the water. Heat the eggs for 3 1/2 minutes. Make sure the temperature of the water never goes above 142ºF or you will cook your eggs.
STEP 4 – Transfer your pasteurized eggs into a bowl of cold water to stop the heating process. Then store them in the fridge to use later! That’s it!
If you are pasteurizing extra-large eggs from your own chickens then heat them for 5 minutes instead of 3.