Time To Move Into The Chicken Coop | Chicken Run
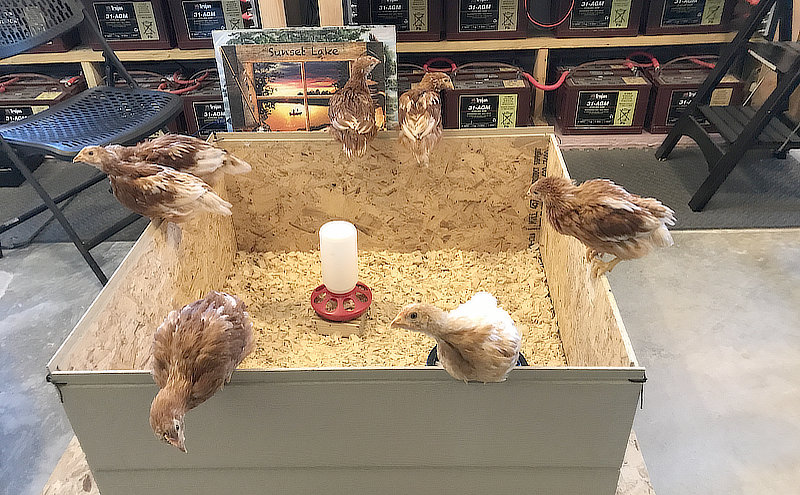
How do you know when it’s time to move the chickens (pullets) from the brooder to the chicken coop? Well, they sort of let you know…
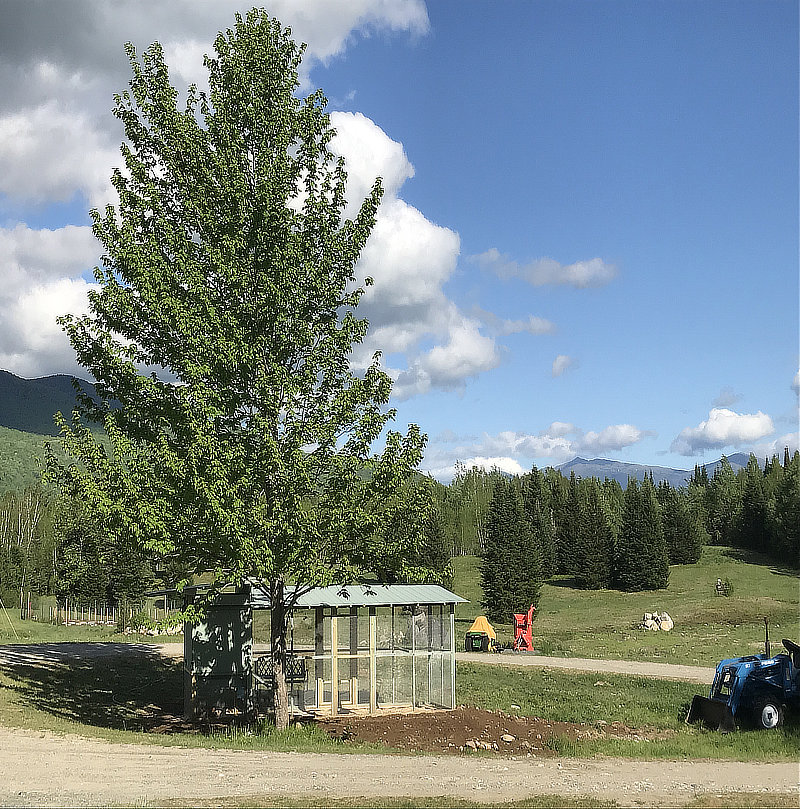
They sure do grow fast! The picture above was taken 10 days ago, the day we moved our ISA-Brown’s to the coop. They were 7 weeks old at the time. They could have gone out sooner than that. But the run wasn’t quite ready till then.
My last post was about the “dropping board” that I built, designed to catch their droppings under their roost (75% of droppings happen while they roost at night!). I also showed you how I insulated the coop since it gets pretty cold up here during the winter.
Now that they’re moved in, I thought I would show you some pictures of my progress as I built their palace…
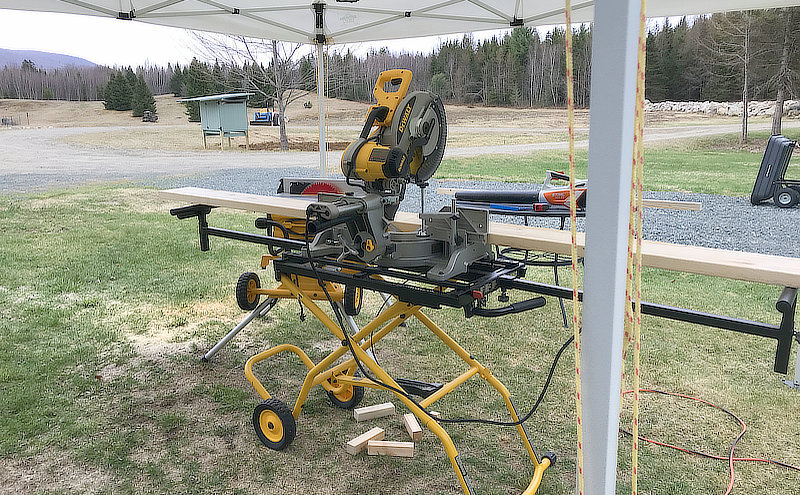
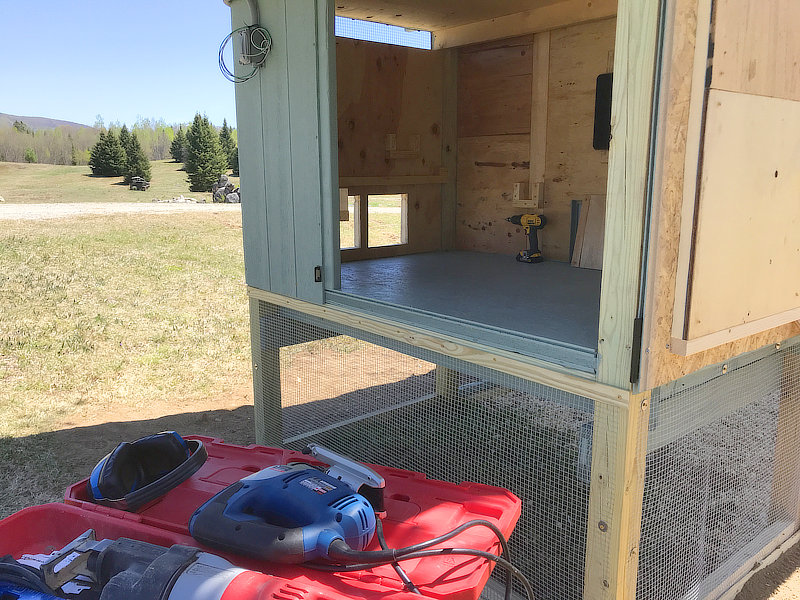
My Dewalt miter saw and table saw. First used to help me build the shop/garage and now the coop/run. Love those tools!
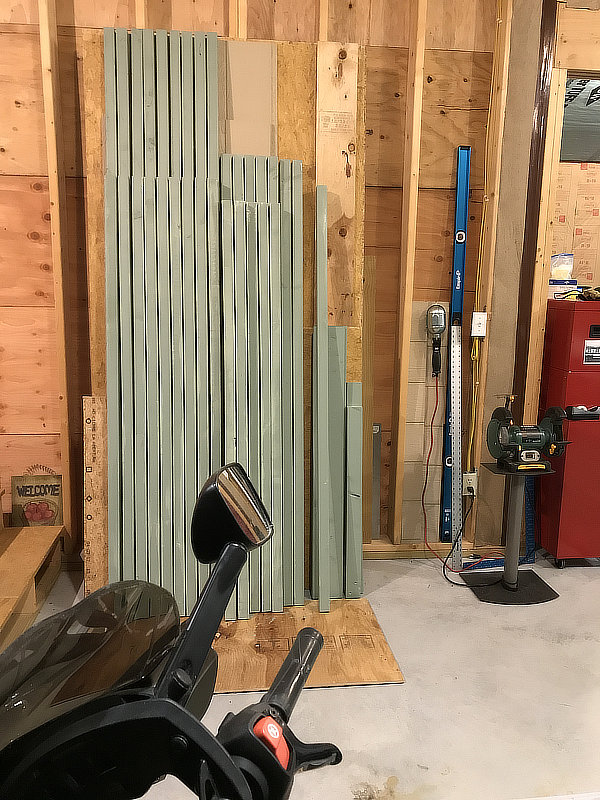
I had a bunch of various 2×6, 2×8’s leftover from building the shop. So I ripped some of them with the table saw for framing the chicken run. These boards were not pressure treated so I painted them all. I did use pressure treated for the sill plate contact with the ground, atop of which I secured the framing itself.
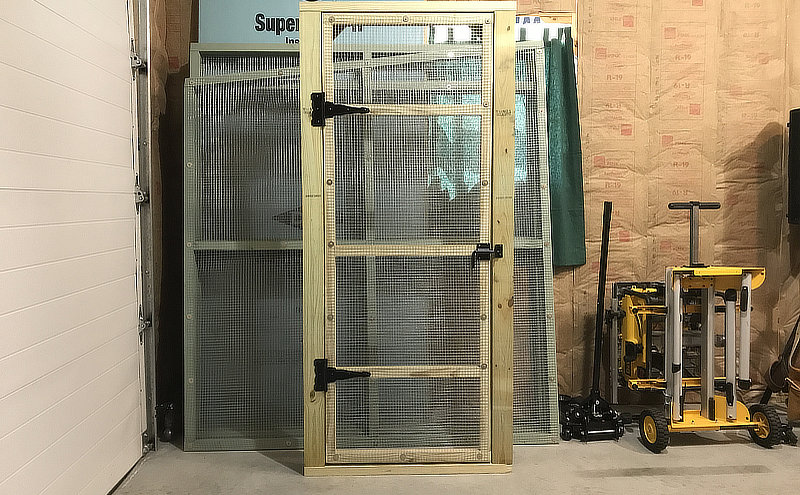
Then I built all of the chicken run panels. And the door. The most difficult part was putting on the hardware cloth screening. What a pain to work with! It took awhile, but it came out pretty good.
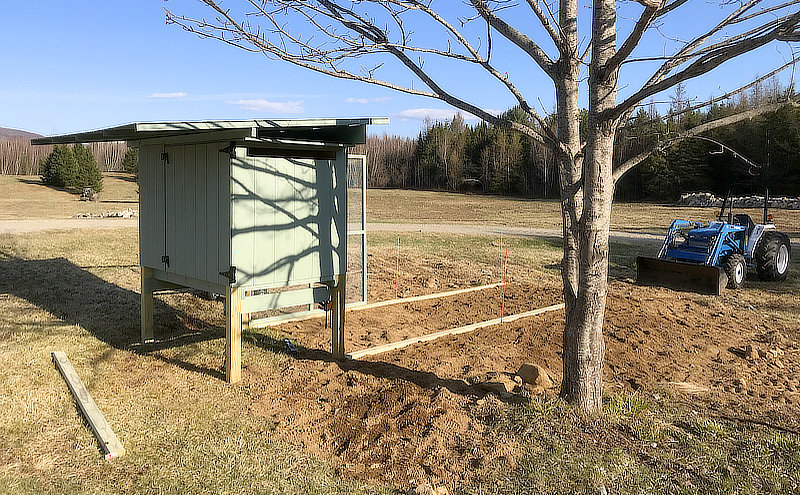
Then it was time for some dirt work. Added quite a few yards of dirt to fill and level off the area for the chicken run. A good excuse to use the tractor (grin). Then I laid down some PT 2×4’s and squared the run so I could start attaching the panels.
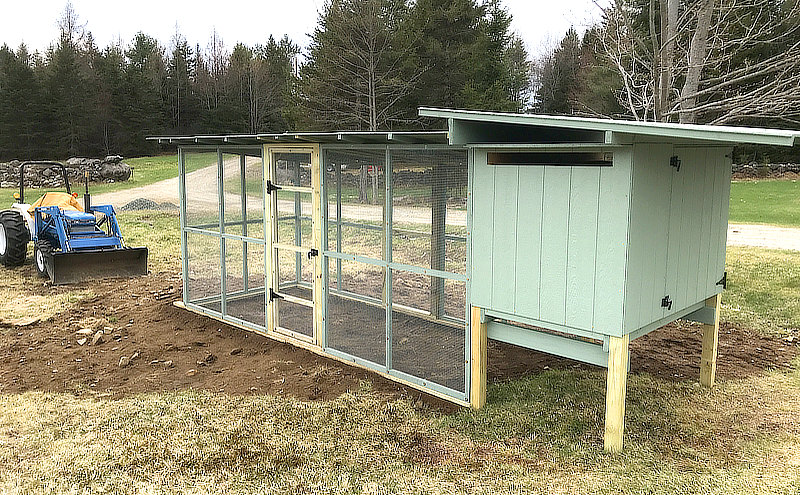
Attaching the chicken run panels and the door. Oh, and the joists to support the 4×8 roof panels.

After awhile, that part of the project was complete. I attached the roof too. I used “Smartside” panels which are resin infused for outdoors. Painted them too. There are still a few more things to do though…
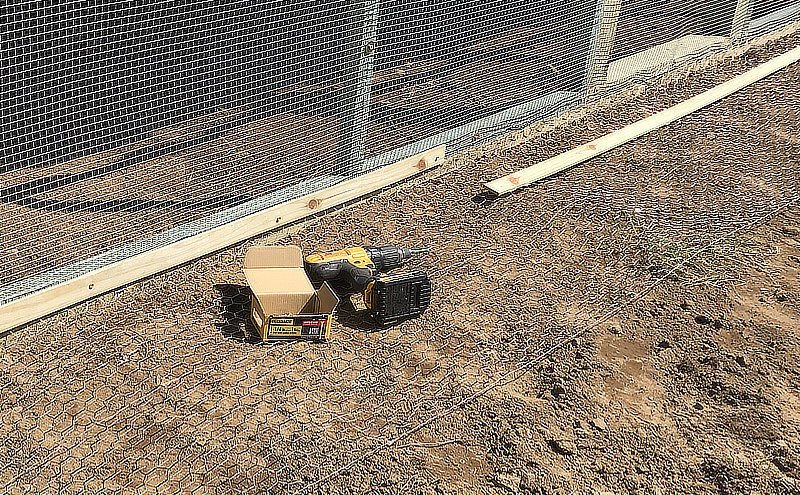
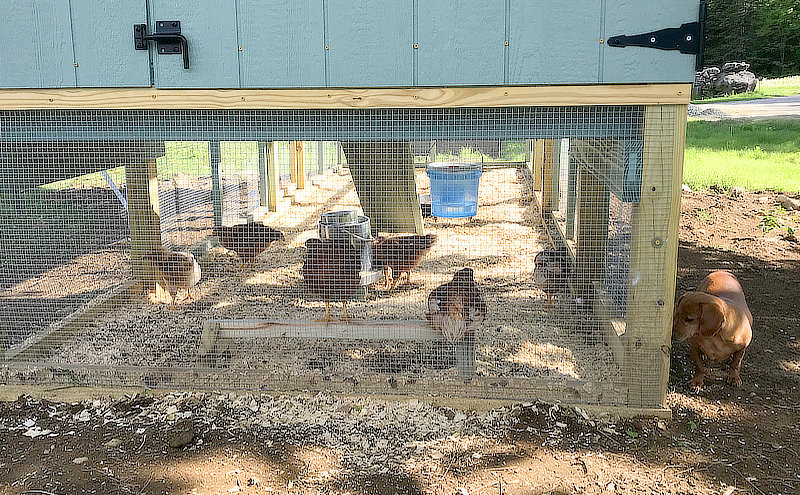
Important. Attach chicken wire to the bottom of run fence. Extend two feet all the way around the run and coop. This will discourage predators (e.g. fox, racoon) from digging their way in. First I stapled it, then covered with strips of PT which I ripped about 1/3″. Secured the strips over the chicken wire to hold nice and secure.
After securing the two-foot perimeter chicken wire, then I covered with a few inches of dirt. Planted grass seed, the roots of which will end up binding into and through the wire.

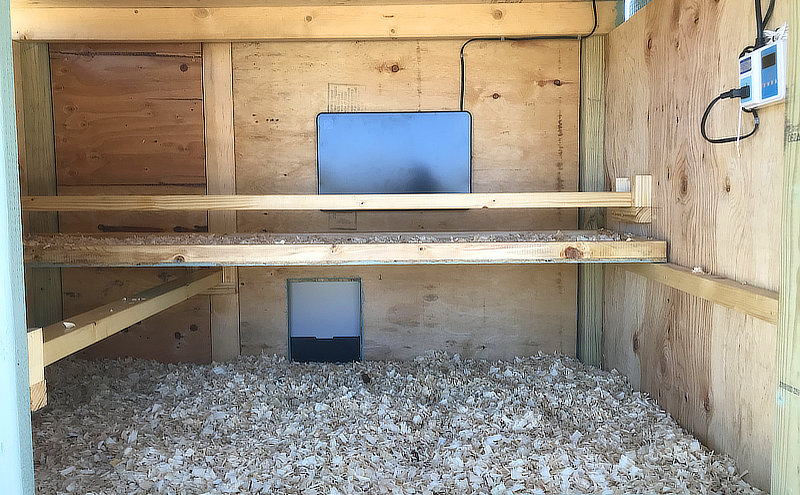
I had been planning to build a 2-port nesting box to set inside the coop. I changed my mind. Instead I’ll build it to attach external to the chicken coop. This will provide more room for the hens inside, especially during the winter when they’ll probably be inside a lot. Since it was an after-thought, I had to get out the ‘ol Milwaukee Sawzall reciprocating saw to cut the holes through the existing wall. I’m almost done with the nesting box. Hope to finish it today and attach. Though won’t be needing it till they start laying (hopefully by August).
I did install electricity into the coop. Primarily for the chicken coop heater pictured below. Though it looks like a flat screen TV for the chickens, it’s actually a infrared (safe) chicken coop heater. You can read more about it (here on amzn) if you’re interested. It will be controlled by this temperature controller, (you can see it mounted on the wall) enabling any on/off set point range. Though these hens will be cold weather tolerant, they will have heat in the coop when it gets really cold.
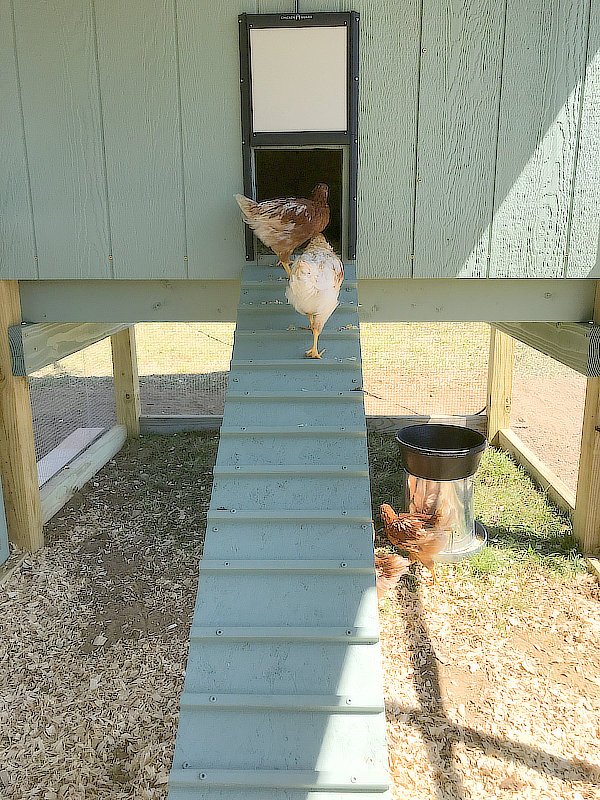
Here’s the chicken ramp that I built. It’s about 5 feet long and angles about 30-degrees to the ground. I cut walking strips and spaced them 4 inches apart. Seems perfect. It took a little coaxing with food, but it didn’t take long and they were up and down… Also you can see the chicken coop ramp door. I decided to splurge and get a “Chicken Guard Extreme” automatic door opener (with predator safe door). This way if we’re ever gone for a night or two, the chicken situation will be self-sustaining without human intervention. Hey, I had to spend some of the government stimulus money, right?
I recently modified the chicken coop vent (there’s one on each side). First I built a track and installed under the vent. It will enable various height 1/2″ boards (cut from sheathing) to slide in and cover some of the vent. Why? When it gets wicked cold in the winter. Never block all the vents! The hens produce moisture/humidity from breathing which could result in frostbite when very cold if not vented. However closing off some of the vent will help with the heater. I also installed baffles to block direct wind from blowing in the coop.

Happy Chickens. You can see Sampson looking in on them. He absolutely loves to be out there, running around the coop (wishing he could get in). The chickens actually play with him while running around. So funny to watch.
The leaves are finally out, the grass is green, spring is here. And the chickens like it under the maple tree.