Electric Fence For Garden – Battery Powered And Solar Charged
Electric fence for around the outside perimeter of an existing garden fence. One that’s powered by a 12 volt battery, and kept charged with a solar panel trickle charger. Here’s all the components and materials that I chose for the project, and how I installed everything.
First, why put an electric fence around the perimeter of an existing garden fence? Because this particular garden area fence is just made of that plastic material, and only 3 feet tall. It surrounds a number of raised garden beds. Although it has kept curious critters out (so far), I wanted to add an additional layer of security to help ensure that a potential garden critter thief would be quite effectively deterred. So, an electric fence.
My objectives building this electric fence around the garden were as follows.
- To keep out animals ranging in size from that of a woodchuck, a rabbit or raccoons, to that of a bear or deer. A low wire, a mid wire, and a top wire.
- The electric fence charger must be battery powered, requiring no connection to home AC power.
- The battery needs to be trickle charged with the appropriate size solar panel charger.
- Electric fence wire that’s easy to install and work with.
My Choices For Electric Fence Charger, Wire, Solar Panel, and Accessories
The electric fence charger is the heart of the system. So lets start with that.
Battery Operated Electric Fence Charger
I did my research before choosing an electric fence charger for the garden. I figured that I didn’t need anything really powerful (it’s not for a field perimeter). Therefore I hoped for a nice simple compact unit. I noticed that there were a number of them – what I would call “all in one” solar powered – battery operated – electric fence chargers. In other words, stand-alone units with solar panel and battery built in.
The problem was, many of the reviews cast doubt that this would perform the way I wanted it to. There were complaints about breaking down. Charging. Batteries not lasting.. That was discouraging.
So, even though the total perimeter length of my 3 wire electric fence would only be about 500 feet, I ended up choosing a particular 5 mile rated DC battery powered (battery not included) electric fence charger with a popular brand name. Was a 5 mile fence charger overkill for my needs? Maybe just a little, LOL. However now I have a quality unit, and one that could charge a much longer fence, if I ever need that in the future.
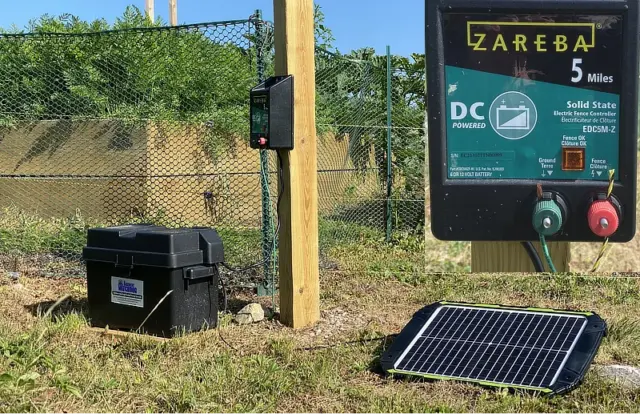
Zareba 5 Mile Fence Charger
Zareba EDC5M-Z
(amzn)
What a nice unit. Good reviews, and just what I was looking for in a stand-alone externally powered DC-battery unit. Though apparently designed for a 6 volt battery, Zareba says that it will work on either a 6 volt or 12 volt battery. It’s spec’d output is 7.3 KV, 0.25 joules (presumably with a 6v battery), which is plenty!
I’m using a 12 volt battery, because that’s what I had on hand. When I measured it, the meter pegged at its maximum reading (9.9 KV). So I suspect that a 12v battery may double the output voltage – probably enough for an elephant!
By the way, no, these do not harm or kill animals. High voltage, but low current. Kind of like getting a static ‘carpet shock’ at home, but on steroids! A serious jolt though – don’t touch it!
I bought a Fence (voltage) Tester to verify things afterwards… As I said, it maxed out the meter!
ALLOSUN (EM555)
(amzn)

Solar Panel Charger For Charging The Electric Fence Battery
Obviously, the electric fence charge unit runs 24/7. I can hear it ‘pulse’ inside the unit about every second or so. I could not find exact specs on battery drain, however I’m sure that it’s not much. It will basically run forever on a small ‘car’ battery with a solar panel trickle charger hooked up. I suggest using a plastic battery box to protect your connections (example on amzn).
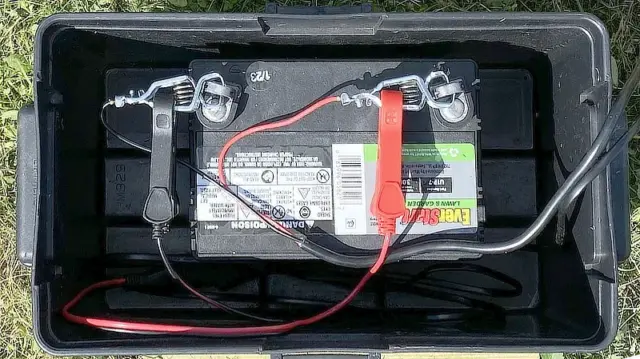
Right now I have an EverStart U1P-7 ‘lawn and garden’ battery in there (from Walmart). So far I haven’t needed to upgrade to a ‘car battery’ or deep cell. But I have it if I need it..
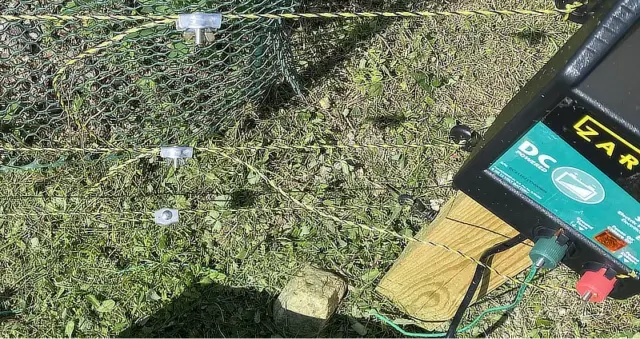
The following photo shows the 12 volt battery in the battery box. The solar panel cable came with attached battery clamps. The Zareba fence charger came with a cable with pigtails, which I attached to a pair of spring clamps which I had (uxcell clamps).
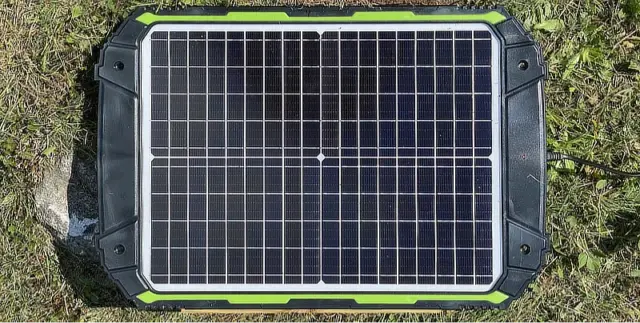
What size solar panel to keep the 12 volt battery charged up for an electric fence unit such as this? I decided upon a 20 watt panel with 3-stage ‘smart charging’ and a built-in MPPT controller chip (which can make a big difference for solar efficiency). Specs indicate bulk charge approx. 1A, float 0.15A (at 13.8V). Seemingly plenty of ‘juice’ for my application.
My Solar Charger & Maintainer
(amzn)
Electric Fence Wire
Zareba Polywire (200 meters)
(amzn)
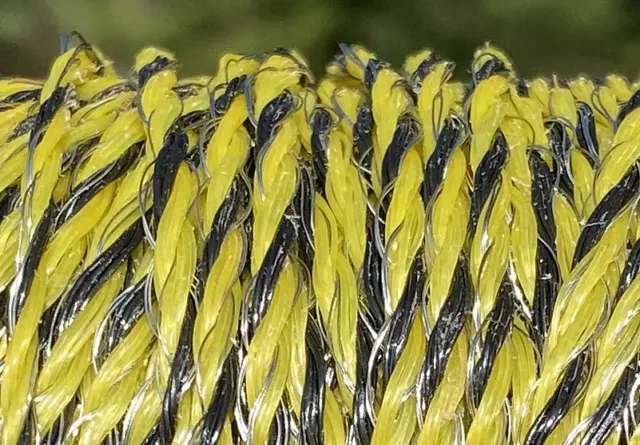
I chose the Zareba Polywire. They also call it fence rope. Or polyrope. I’m glad I bought this as opposed to standard (stiffer) solid wire because it was so easy to string along and work with for my garden electric fencing perimeter. It has 6 conductors wound within it. Here’s a closer up picture:
By the way, these are the polyrope connectors that I used to connect each of the three lines over to the charge unit.
1/4-inch polyrope connector pack
(amzn)

I simply daisy-chained the individual electric fence lines to one feed which I connected to the RED terminal on the charge unit.
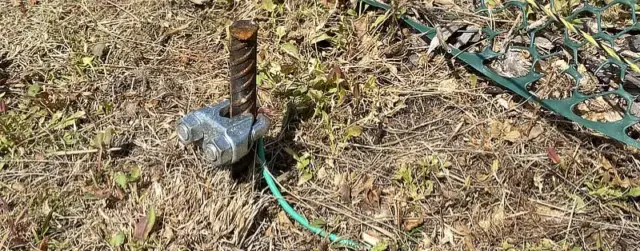
A ground rod connection to the BLACK terminal is required for the electric fence charger to work. They say if you’re in dry soil, you may need to connect several for effective grounding. And long rods if you’re able. I simply used two (2′) rebar rods. My soil is plenty moist, my perimeter is small, and my soil tends to be rocky (unlikely to get a long ground rod down there!). Anyway, what I did, worked fine.
Electric Fence Supports – Corner Posts and in-between Posts
I installed a 4×4 post at every corner for solid support. Having solid corners enables pulling the wire good and snug so it won’t sag or droop at all. I hesitated using T-posts on the corners, figuring that they might lean with the tension of the electric fence wire. In retrospect, this probably would have worked well enough with the polywire. But I over-engineered the corners :-)
Here’s a picture of one corner post with electric fence screw-in insulators (for wood) that I used for this:
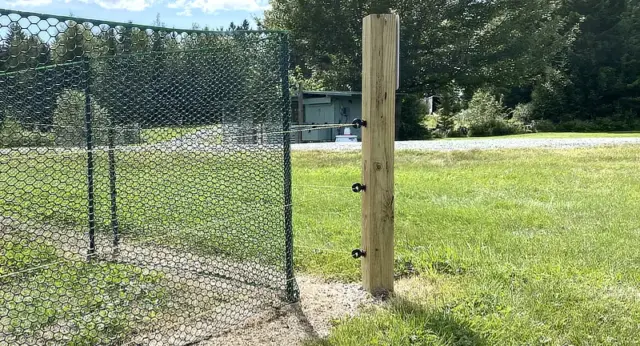
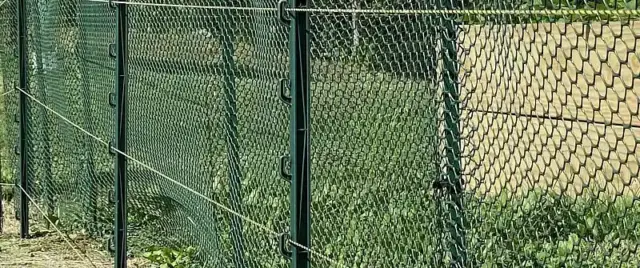
After the corner posts were set, I strung the electric fence wire all the way around to each side of the gate (which also had 4×4’s on each end). I double looped the wire at each corner to get it good and snug as I worked my way around.
Afterwards, along the taught wire line, I spaced out the plastic support posts (link) every 6 feet or so. With these posts, I did not have to purchase separate insulators because the wire notches are built-in, sort of similar to that of a T-post. This made it easy to hold the polywire (it just snaps in).
There are various support posts that you can get for electric fences. I only needed something lightweight and good enough to just hold the wire, since the corner posts were taking all the tension.
Height of Electric Fence around the Garden
Electric Fence Posts (assortment on amzn)
The support posts that I purchased are only 30 inches tall. I had not realized that 6 inches of that was the spike end that’s pushed underground. So the top wire is only 24 inches high. But that’s good enough for a typical garden in my opinion. Even if a deer edges up to the fence, the legs are going to rub against a wire.
In retrospect, maybe I would’ve sprung the extra $ for 48″ tall supports or thereabouts. But again, I really don’t think it will matter. Bears and deer are still going to get ‘stung’ on what I’ve put up if they try to get in.
The low wire. My main concern are the woodchucks, raccoons, rabbits and such. It’s the lowest electrified wire that I thought about the most. And how low to put it. You see, if it’s too low, and if grass, weeds, etc.. grow up on the wire, this will start shorting out the electric fence to an extent. So I decided upon 6 inches. Additionally, I weed-wacked really good around the fence line. And, ((gasp)) I used some RoundUp on the perimeter.
How far away from the existing fence did I install the electric fence? I’d say about 8 inches, to ensure the plastic garden fence material (which is floppy in places) would not interfere with the wire (though it’s plastic, so it wouldn’t short out anyway).
In conclusion, an electric fence for your garden will help provide a great level of security to losing your crop from nature’s critters. Though I have a bigger garden down back with a tall metal fence, I’ve established another location (closer to the house) for my raised garden beds). I started with just a few, just for fun. I seem to keep adding more. Then I expand the perimeter fence to accommodate. Well this year after adding two more, I decided that this little ‘fun area’ for gardening probably looks increasingly mighty tasty to our resident critters. Don’t want to lose all that work of gardening to a woodchuck, so, up goes the electric fence. So far, so good.
[ Read: Beets – One of Many Good Choices For A Survival Garden ]
[ Read: Filling The Bottom Of Deep Raised Garden Beds With Organics ]